EQUIPMENT RECORDING PICTURES BEFORE AND AFTER TRIGGER

■RECORDER

A device that can record images from before an event occurs is called a skipback recorder.

The images below can be saved before and after an external trigger signal is input.
You can also extract the images you need as still images.

スキップバックレコーダー


■USB CAMERA + SOFTWARE


Also, if you can use a PC without using such equipment, you can record videos before and after the trigger occurs by using a USB camera or GigE camera and equipment monitoring drive recorder software.

HOW TO IMPORT ANALOG RGB SIGNALS TO PC

The biggest advantage of our PC monitor direct camera GR80XGA3 is that you can view high-resolution images on the monitor without display delays or afterimages. Another feature is that it is easy to connect directly to a monitor and can immediately check images. (No PC is required. Of course, there is no need to install any software.)


任意ライン発生機能付PCモニタダイレクトカメラ  
With arbitrary line generation function
PC monitor direct camera
GR80XGA3


Although this camera has the advantage of being directly connected to a monitor without the need for a PC, we sometimes receive requests to connect this image to a PC, or to connect it to both a PC and a monitor through a distributor.
We will introduce two ways to import images from this camera to your computer.


1. Capture board (desktop PC only)


Usually, capture boards for analog RGB (15Pin D-sub) image formats tend to be expensive.
Among them, AVerMedia Technologies’ capture board “Game Broadcaster HD AVT-C127” is relatively low priced.


Game Broadcaster HD AVT-C127


We tried using this capture board to see if I could import images taken with a PC monitor direct camera to our computer.


The selling point of this capture board is that it allows you to easily record images from your iPhone/iPad onto your desktop computer, and you can purchase it at low prices at computer stores. You can also purchase it online for around 12,000 yen. When I actually used this board to take still images, I was able to take and save them without any problems.


Furthermore, by using this capture board’s dedicated capture software (RECentral), you can save videos in MP4 format. An MP4 format video shot for 20 seconds at a resolution of 1280 x 1024 (four times the resolution of a normal industrial video camera) has a relatively small capacity (size) of approximately 30MB. Generally, videos shot in AVI format have approximately 10 times the capacity as MP4 format.
Please note that for some reason, I was unable to record video using the dedicated capture software (RECentral) when I selected “AVI” as the video setting.
Of course, you can also use our Viewer software. .
A desktop Windows 8 or Windows 7 computer is required to use this capture board.
We tested it on a Windows 8 desktop computer.

Game Broadcaster HD AVT-C127


I don’t know if it can be used on all desktop computers, but it can be done at a relatively low price, so I think it’s worth trying.


2. Analog RGB-USB converter (can be used with desktop PCs and notebook PCs)


Below is a converter from Epiphan.
It can be used on both desktop PCs and notebook PCs.

アナログRGB-USB変換器


<Usage example image>
アナログRGB-USB変換器

VGA CABLE EXTENSION

The VGA standard has no length limit, but it is generally around 30 meters.
However, commercially available cables with a length of 60 m are also available.


VGAケーブル


However, there are various extenders on the market, and if you use them, it is possible to extend beyond 300 meters.


The following is an extender that uses a LAN cable to enable extension up to 300m.


モニタ延長期

INTRODUCTION TO USB CAMERA TRIGGER SOFTWARE

Introduction of USB Camera Trigger Software

Shodensha USB Camera Trigger Shooting Software Series~


We will introduce trigger shooting software that is perfect for applications such as starting recording using an embedded USB camera triggered by a trigger signal from a program controller (PLC), sequencer, etc.


①Do you have any of the following problems when installing cameras on factory lines?

 ・I want to build software or programs, but what should I do?
 ・I want to build software or programs, but I don’t have enough manpower.
 ・I want to build software or programs, but I don’t have the time.
 ・If software and programs are outsourced, they are custom-made and the price is high.
 ・Although it is a multi-functional software, the price is high accordingly.
 ・There is no need for so many functions.

   →Perfect for such customers! Trigger photography software focused on a single function


②What is the Shodensha USB Camera Trigger Shooting Software Series?

The world is full of expensive trigger-compatible software that has multiple extra functions even though you only need that single function.

Our trigger shooting software series has achieved this even though only a single function is required.

Furthermore, since we focused on a single function, we were able to achieve it at a low price.
In other words, our trigger shooting software is low-priced trigger compatible software that focuses on a single function.

Petitsoft activates the desired function by inputting an external trigger signal from a program controller (PLC), sequencer, etc.
Compatible with our industrial USB cameras DN series and CS series.


③Trigger shooting software series ~Lineup~

 By inputting an external trigger signal
・Save and capture camera images as still images (BMP/JPEG)
    = Trigger shooting software HiTriggerF-Light


・Save still images simultaneously while live monitoring video from up to 4 cameras
    = Multi-screen display trigger storage software HiTriggerQ


・Record a long video (like a drive recorder) before and after trigger signal input
    = Equipment monitoring drive recorder HiTriggerWatcher


・Record videos for a long time, compress and save them, or record on a timer
    = Compressed long-term recording software HiTriggerRec


  This is the regular lineup of Shodensha trigger shooting software series for USB cameras.


④Trigger shooting software series ~Special order support~

 Shodensha has a full-time staff of software engineers who have been engaged in image processing software development for over 30 years.
 Therefore, we also accept custom orders for the trigger photography software series for DN cameras.
  ・I want a single function like this.
  ・I would like to see additional functions added to the trigger shooting software.
  ・I want to do something like this.
 We can also develop custom software if you discuss your needs.


Don’t worry if you don’t like the program!
We will handle the production for you. (Paid)

DIGITAL SLR CAMERA SENSOR SIZE

There are generally three sensor sizes for current digital SLR cameras:


Full size: 35mm horizontally

APS-C: 23.4mm horizontally

Micro Four Thirds: 17.3mm horizontally


However, these standards are not strictly defined, and manufacturers may have different names and slight differences in actual size.

A large sensor has the following advantages:

Your field of vision will expand. For example, when attaching a microscope lens (NDPL-1), a larger sensor provides a more natural field of view.
Even with the same number of pixels, the dynamic range is expanded.

REGARDING RASPBERRY PI (RASPBERRY PI) COMPATIBILITY OF INDUSTRIAL CAMERAS

Raspberry Pi is an ultra-small, lightweight, and extremely affordable board computer developed by the British Raspberry Pi Foundation.

Although it was primarily developed for educational purposes, it is now widely used as a hobbyist and industrial IoT controller.

There are multiple models, and OS (operating systems) include Linux-based Debian, Fedora, and Arch Linux.

(It is also possible to use Windows 10 IoT Core as the OS on some models.)

In industrial applications, it is widely used to control various sensors and send data to servers through GPIO (general purpose signal input/output terminals) mounted on the board and LAN. On the other hand, in the hobby field, easy construction of high-quality music players, media servers, etc. is gaining popularity.

ラズベリーパイ:Raspberry Pi


The photo above is a Raspberry Pi 3 Model B+.

The Raspberry Pi also has a port for a camera, but you can only connect a dedicated camera, and there are complaints that you can’t get enough image quality, you can’t change lenses, and it’s difficult to extend cables.

However, the Raspberry Pi OS also supports UVC (USB Video Class) cameras as standard.

※1 Older versions of the OS may require an upgrade. You may need to set up a UVC camera driver.


HOW TO FIX THE CAMERA

Most camera mounting screws are the same standard as tripod screws.

This standard is commonly referred to as “camera thread” or “tripod thread.”

There are very few differences between different manufacturers and camera types.

The commonly used screw size is 1/4 20UNC.

The same applies to single-lens reflex cameras, small digital cameras, surveillance cameras, and F.A.A.

The mounting screws shown in the photo below are all the same size as well.


1/4-20UNC


However, although there are a small number of large and old cameras, 3/8-16UNC (3/8 inch coarse) screws may be used. In this case, the screw diameter is approximately 9mm.

Of course, you can use screws to secure the camera, but there are a variety of fixing devices available on the general market.

These fixtures come with a variety of features, including adjustable angles. Therefore, one option is to use ready-made products.

Since standard screws for cameras are used, commercially available camera accessories (tripods, pan heads, etc.) can be used. There are also conversion screws from 1/4 inch to 3/8 inch on the market, so you can use a tripod or other fixture even if the screw size is different.


三脚等の固定具 三脚等の固定具

・Example of consumer product camera fixtures
The following is part of LPL Co., Ltd.’s catalog.

民生品のカメラ固定具

民生品のカメラ固定具

・Example of industrial camera fixture
The following is part of SFC Co., Ltd.’s catalog.

産業用のカメラ固定具


It may also support the lens if it is long and heavy.

(All of our microscope lenses have a fixed part with a diameter of 50 mm.)


レンズ側をホールド


レンズ側をホールド  


HOW TO STORE CAMERAS AND LENSES

Cameras and lenses don’t have to be left everywhere, they need to be stored properly and correctly.
If it is not stored correctly, it may cause problems such as dust contamination and mold formation.
In this article, we will introduce how to store cameras and lenses.


● Precautions for storing cameras and lenses

One thing to keep in mind when storing cameras and lenses is dust and moisture.

If dust gets into the lens or camera sensor, it cannot be easily removed and may have an unwanted effect when shooting.

In addition, moisture can cause the lens to fog up and mold to grow.

If dust gets inside the camera or lens, or mold occurs, the only way to prevent mold is to disassemble and clean it, so it is important to prevent mold from forming.

In addition, cleaning the camera and lens (removing dust and mold) is not covered by the manufacturer’s warranty. If you ask for repairs, it will cost you a reasonable amount.

(The warranty is applied immediately after purchase, but not in the case of repairs.) )

Therefore, care must be taken to store it from dust and moisture.


● What is the best storage method?

The inside of cupboards, drawers, and desks are places where dust and mold are likely to form. The same is true even if you have it in your camera bag. In general, the humidity suitable for storing cameras and lenses is about 40-50%. If the humidity exceeds 60%, mold is likely to grow, and conversely, an environment with extremely low humidity is also undesirable.

Therefore, it is important to maintain the right humidity.

You should also pay attention to temperature differences, as sudden changes in temperature can cause condensation.

① Prepare a case to store your camera and lenses


First, prepare a case (storage container) to store your camera and lenses.

By placing it in the case, it prevents dust from entering, and by sealing it, it prevents moisture from entering.

Some common types of cases include:

~ Dry box (moisture-proof cabinet) ~


This is a dedicated moisture-proof storage room for storing cameras and optical equipment.

There are various types from small to large cabinet types.

It can maintain a constant humidity at all times, so you can store it with peace of mind. It is sealed and protects against moisture and dust.


防湿保管庫  
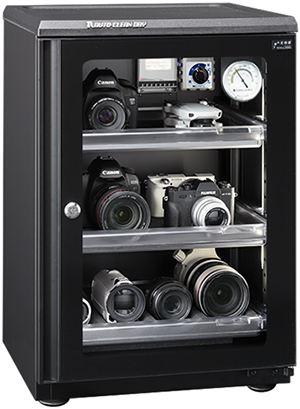
Moisture-proof storage manufacturer Toyo Living Co., Ltd.’s HP


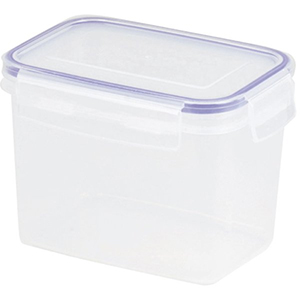
~Simple dry box or sealed container~


 Simple dry box is easy and popular.

It is a sealed moisture-proof case provided by camera accessory manufacturers, etc., and it is possible to control humidity by putting a desiccant inside and placing a simple hygrometer.

It is easy to use because even beginners can easily store cameras and lenses. Recently, it is also possible to substitute airtight containers for food with rubber seals on the lid, which are available at 100 yen shops and home centers.

It is cost-effective and protects against moisture and dust, but requires regular humidity checks and desiccant replacement.


簡易ドライボックス  


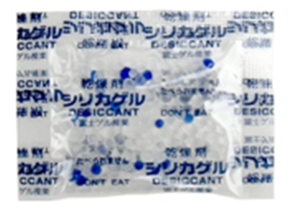
② Prepare the desiccant


Simple dry boxes and airtight containers for food should be filled with desiccant to reduce humidity.

You can also substitute a commercially available desiccant for dry boxes or silica gel for food.

Be sure to include a desiccant and a hygrometer to check the humidity.


シリカゲル


③ Clean thoroughly before storage


Cameras and lenses that have been used may have dust on them.

Properly clean it before storing.

It doesn’t make sense to bring dirt in when storing cameras and lenses in an enclosed space.

④ Cleaning and cleaning of cameras and lenses


Use a blower provided by a camera accessory manufacturer to blow away dust and fine particles from the camera and lens.

Carefully wipe off dirt and oil on the surface with a cleaning cloth.

Sweat and oil on your hands can lead to mold growth, so wipe them off thoroughly.

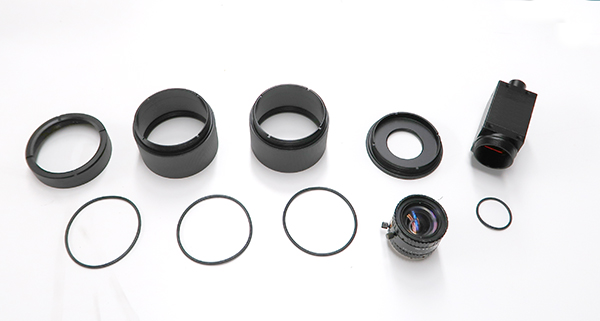
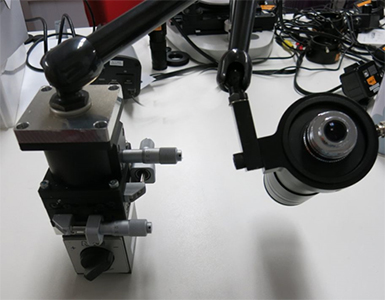
It is a question of whether or not to remove the lens from the camera when storing it, but it is okay to store it with the lens attached.

Rather, by reducing the number of times the lens is attached and detached, the risk of dust contamination can be reduced.

However, if you are going to remove the lens, it is important to attach the cap to the camera’s lens mount and store it.


● Temporary storage of cameras and lenses

Care must be taken when temporarily replacing the lens. Even if you can’t see it, there is dirt, dust, and dust floating in the air.

Even at home, you can see that dust accumulates on shelves.

When replacing lenses, the risk of dust and debris entering increases.

Therefore, you need to be very careful about how you place your camera and lenses.


カメラ、レンズの一時保管 
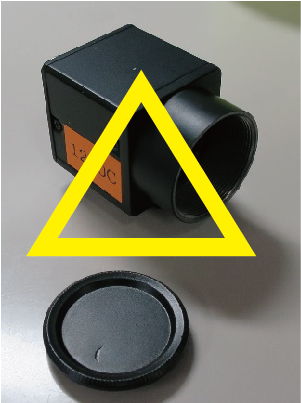
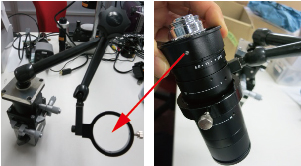
The camera sensor is bare and facing the top, and dust falls on the sensor inside the camera.  
カメラ、レンズの一時保管   
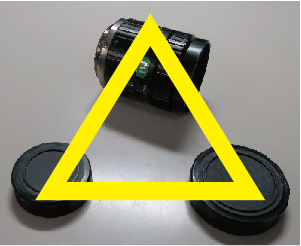
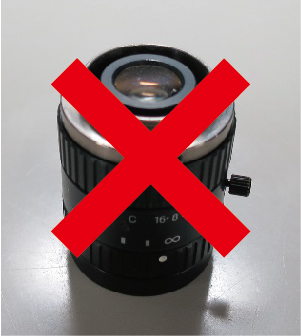
The C-mount part of the lens is exposed and facing the top, and dust falls on the lens.
カメラ、レンズの一時保管 
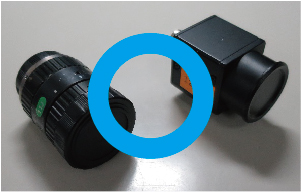
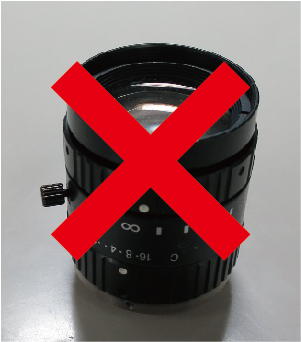
The side of the lens object is bare and facing the top, and dust falls on the lens.


When you buy a camera or lens, it may come with a cap (lid).

Installing the cap as soon as possible reduces the risk of dust contamination.

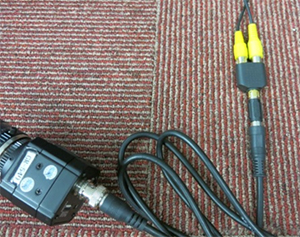
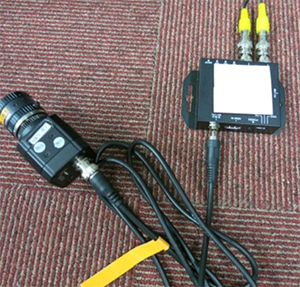
When changing the lens, it may be temporarily placed on the desk, but care must be taken when doing so.

Make sure that the surface of the sensor or lens is not facing up, and that it is placed sideways to prevent dust from adhering to it.


カメラ、レンズの一時保管

 Even if the camera sensor is placed sideways, there is still a danger. Therefore, it is advisable to install the cap as soon as possible. 

カメラ、レンズの一時保管 

 Even if the surface of the lens is placed sideways, there is still a risk. Therefore, it is desirable to install the cap as soon as possible.

   
カメラ、レンズの一時保管 

 Attach caps to both ends of the lens and attach caps to the camera body.

● Summary of how to store cameras and lenses

・The camera and lens are sensitive to dust and moisture.

・If dust or mold gets into the camera or lens, it will be difficult to remove.  Therefore, it is important to store it in an environment where dust and mold do not form.

・To prevent dust and mold from forming, store it in a special case.

・Before storing, take good care of the camera and lens and do not bring in dust, dirt, or grease.

・There is no problem even if the lens is attached.

・Caution must be taken when temporarily storing or replacing lenses.

HOW TO INCREASE THE MAGNIFICATION OF A VIDEO WITHOUT CHANGING THE FOCAL LENGTH

When using a USB camera, there is also a software option to apply digital zoom, but this may come at the expense of resolution.

For example, if you use a 2 million pixel camera at full resolution, the resolution will be 1600×1200.


The resolution is 800 x 600 = 480,000 pixels. If the magnification is 2x, the resolution will be 1/4, and if it is 3x, it will be 1/9.

Even in the case of 5 million pixels, it will be 1.25 million pixels with 2x digital zoom and 550,000 pixels with 3x.

Optical zoom, on the other hand, allows you to increase the magnification without sacrificing resolution (although it actually drops slightly).

Even if the lens does not have the ability to increase the focal length, you can easily increase the magnification by using a component called a rear converter. In addition, when using a rear converter, there is no need to change the installation position of the camera, since the focal length and other factors do not change.


2倍のリアコンバータ


4 DIVISIONAL 80-LAMP LED RING LIGHTING LED-80T

Dimmable even when lighting independently in 4 parts!
With a removable diffuser plate!

● Inner diameter φ70mm, tip inner diameter φ60mm, outer φ96mm

● 4 divisions can be lit independently

● Dimmable even when lighting independently in 4 divisions

● Diffuser plate can be removed

● Can be attached to microscopes, microscopes,…

HOW TO EASILY MAKE AN ORIGINAL CAMERA STAND

Below are the upper and lower limit adjustment stays for our camera stands.


The adjustment stay of our camera stand has the following structure.


27mm pitch
Fixed with two M4 screws.
Remove this part and attach the original fixture to the tip to make the original adjustment stay.

   
The following is a lens that we manufactured according to the customer’s lens size.
We can also accommodate such requests.
   
 The tip is fixed with a 27mm pitch M3 screw.


CAMERA STAND FOR USE IN THE FIELD

1.Magnetic stand with thick articulated arm


現場で使えるカメラスタンド


2.Compact camera base with 3D arm 

A 5.5Kg base is attached to a post and horizontal bar.
The base acts as a weight, so the horizontal bar is stable even if it is long.


現場で使えるカメラスタンド


3.Edge-fixed camera stand with 3D arm

Horizontal bars on edge-fixed posts


現場で使えるカメラスタンド


4.Articulated arm with fixed edge


現場で使えるカメラスタンド


FIELD OF VIEW WHEN CHANGING THE IMAGE SIZE

When using a lens with the same magnification, the smaller the number of inches in the image size, the larger the magnification and the narrower the field of view.

Take a look at the pictures below.


The lens, monitor, and focal length are taken under the same conditions.


1/2 inch camera
1/2.5 inch camera
1/3 inch camera

You can see that the 1/3 inch camera has a narrower field of view than the 1/2 inch camera.

Also, when selecting a lens, it is necessary to check the compatible image sensor size of the camera.

Please note that if you select a lens that is smaller than the camera’s compatible image sensor size, a phenomenon called vignetting may occur.

You can see black areas (vignetting) in the four corners of the screen.

We can also help you with the selection of lenses and cameras. For more information, please contact Technical Support.

SONY CMOS SENSOR IMX183

SONY CMOS sensor IMX183


The IMX183 has a pixel size of 2.4×2.4 μm and is a rolling shutter sensor.

The pixel size is as small as 2.4 μm and the sensor size is 1 inch. SONY’s unique back-illuminated technology achieves excellent image quality with high sensitivity, making it ideal for building optical systems.

SONY CMOS Sensor IMX183 specifications

Number of pixels: 20 million pixels (resolution 5472×3648)

Pixel size: 2.4μm×2.4μm

Sensor Size: 1 inch

Shutter method: Rolling shutter


USB3 Vision Camera (USB3.0, 20 million pixels, color) CS2000-C

IMX183

USB3 Vision Camera (USB3.0, 20 million pixels, monochrome) CS2000-B

IMX183
   

1-inch GigE camera (20 million pixels, color) EG2000-C

IMX183

1-inch GigE camera (20 million pixels, monochrome) EG2000-B

IMX183

SONY CMOS SENSOR IMX226 

SONY CMOS sensor IMX226 

The IMX226 has a pixel size of 1.85×1.85 μm and uses a rolling shutter method.

SONY’s Pregius series is characterized by high sensitivity and low noise performance. The sensor is 1/1.7″ in size and is available with standard and affordable 2/3″ C-mount lenses.

SONY CMOS sensor IMX226 specifications


Number of pixels: 12 million pixels (resolution 4000×3036)

Pixel size: 1.85μm×1.85μm

Sensor size: 1/1.7 inch

Shutter method: Rolling shutter


USB3 Vision Camera (USB3.0, 12 million pixels, color) CS1200-C

IMX226

USB3 Vision Camera (USB3.0, 12 million pixels, monochrome) CS1200-B

IMX226
   

GigE camera (12 million pixels, color) EG1200-C

IMX226

GigE camera (12 million pixels, monochrome) EG1200-B

IMX226

SONY CMOS SENSOR IMX178

SONY CMOS sensor IMX178

The IMX178 is a rolling shutter sensor with a pixel size of 2.4×2.4 μm.

SONY’s Starvis series supports high sensitivity even in low-light environments by increasing the gain. The sensor has a resolution of 6 million pixels, a size of 1/1.8 inch, and a wide dynamic range, making it suitable for a variety of applications.


SONY CMOS sensor IMX178 specifications

Number of pixels: 6 million pixels (resolution 3072 x 2048)

Pixel size: 2.4×2.4µm

Sensor size: 1/1.8 inch

Shutter method: Rolling shutter method


GigEカメラ(600万画素・カラー)EG600U-C  

GigE camera (6 million pixels, color)

EG600U-C


GigEカメラ(600万画素・モノクロ) EG600U-B  

GigE camera (6 million pixels, monochrome)

EG600U-B


SONY CMOS SENSOR IMX264

SONY CMOS sensor IMX264 

The IMX264 has a pixel size of 3.45×3.45 μm and the sensor uses a global shutter method. The Pregius series manufactured by SONY is characterized by high sensitivity and low noise performance. This sensor is 2/3 inch in size, has a wide dynamic range, and has a resolution of 5 million pixels, making it suitable for a variety of applications.


SONY CMOS sensor IMX264 specifications


Number of pixels: 5 million pixels (resolution: 2448 x 2048)

Pixel size: 3.45×3.45µm

Sensor size: 2/3 inch

Shutter method: Global shutter 


GigEカメラ(ソニー500万画素・カラー) EG501-C  

GigE camera (Sony 5 million pixels, color) EG501-C


GigEカメラ(ソニー500万画素・カラー) EG501-C  

GigE camera (Sony 5 million pixels, monochrome) EG500-B


LOW-COST LED RING LIGHTING GR10-N

At this price, it can be used overseas with double LED arrangement and light intensity increase 100 ~ 240V.

ABOUT INDUSTRIAL CAMERAS AND EXTERNAL TRIGGERS

■ What are the external trigger terminals for industrial cameras?

Many industrial cameras have external trigger terminals.


USB Camera DN Series USB Camera CS Series


This trigger pin is used to control the timing of still image shooting and video recording with a sensor or PLC (programmable logic controller).


Watch the video brief image below.

System Example Video


Of course, even if you don’t use an external trigger, you can use the included application software to save still images and record videos.

However, in actual production lines, it is common to shoot and record at the timing of the object to be photographed, and there are many situations where an external trigger terminal of an industrial camera is required.

Watch the video brief image below.


■ How to use the external trigger terminal?

When using external trigger terminals, there are various ways to use them depending on the customer’s production line.

In addition to simply saving still images and recording videos, it can be used for a variety of purposes, such as recording videos before and after a problem occurs, or shooting and recording with multiple cameras.

Therefore, when using an external trigger pin, it is basically assumed that the customer will program it himself.

Industrial cameras usually come with an SDK (Software Development Kit) for development, which is used to create programs.


■ Still image storage with external trigger

I mentioned that “basically create a program”, but if it is a simple function, application software can be used.

By using it, you can build a system without any knowledge of programming.

Among them, we will explain the most basic “saving still images with an external trigger”.

Even with the simple function of “saving one still image when an external trigger signal is input”, there are two main methods.


And the time display between the trigger and the next trigger is different.

(1) A still image taken with the latest trigger is displayed between the trigger and the next trigger.

・Saved images can be reliably checked in real time.

Even lines with movement can be visually checked using still images.

・When shooting with multiple cameras at the same time, it is possible to shoot perfectly in sync.

We offer the following software:


トリガーソフト トリガーソフト

Trigger Shooting Software

Hi TriggerF Light  

High-performance trigger shooting software

Hi TriggerF Pro 


(2) A method is adopted in which live video is displayed between the trigger and the next trigger.

・Since the live image is always displayed, it is possible to monitor the status of lines other than the object.

・When shooting with multiple cameras at the same time, multiple frames may be out of alignment.

We offer the following software:

トリガーソフト

Four-screen display shooting software

Hi TriggerQ 


■ Video recording with external triggers


In the case of video recording, there are the following two types.

(1) Use the start trigger and stop trigger as triggers

(2) Use only the start trigger as a trigger


In the case of (1), only a simple recording function is provided.

In the case of (2), various functions are available.

In addition to simply recording the specified time by timer control from the trigger, you can also record before and after the trigger (operation like a drive recorder). It is useful for event analysis when a problem occurs.

We offer video recording software that allows you to use both Start/Stop triggers, timers, etc.

トリガーソフト

Long-Duration Recording Software

Hi TriggerRec


Software to record video before and after the trigger


トリガーソフト

Facility monitoring drive recorder

Hi TriggerWatcher 


■ Software Development


Robots, conveyors, drones, AI-based automated inspections, etc., can be linked to external triggers to become independent automated equipment for the first time.

At Shodensha, we help with system development and software development using cameras.


CAMERA STAND FOR USE IN THE FIELD

1.Magnetic stand with thick articulated arm


現場で使えるカメラスタンド


2.Compact camera base with 3D arm 

A 5.5Kg base is attached to a post and horizontal bar.
The base acts as a weight, so the horizontal bar is stable even if it is long.


現場で使えるカメラスタンド


3.Edge-fixed camera stand with 3D arm

Horizontal bars on edge-fixed posts


現場で使えるカメラスタンド


4.Articulated arm with fixed edge


現場で使えるカメラスタンド


DIFFERENCES BETWEEN INDUSTRIAL CAMERAS AND WEBCAMS

Differences between C-mount industrial cameras and webcams

Industrial cameras are used for visual inspection and observation.
This section introduces the differences between C-mount industrial cameras (FA cameras) and web cameras.


Any of the following problems are bound to occur in human visual inspections and counts.


Webcam Features

When people hear the word “USB camera,” they tend to think of a web camera.
They are sold on the Internet and at mass retailers, and simply by connecting to a PC, an image is projected.
They are sold at very reasonable prices and are easy to obtain.

Areas where webcams are used

However, webcams are rarely employed in industrial or industrial settings.
The most likely reason is that the lens is not interchangeable.
A web camera basically has a built-in lens.
webカメラ
The camera and lens are included in a single case.
The price is very reasonable,  including the lens, but the disadvantage is that the lens is not interchangeable.
Just as cameras have pixel counts, lenses also have corresponding pixel counts.
Recently, cameras with high pixel counts are relatively inexpensive, but lenses are not.
Even if a web camera claims to have 5 megapixels, the lens probably has less than 1 megapixel.
Therefore, the image is not clear and blurred despite the high pixel count.
Basically, industrial cameras are divided into a camera body and a lens.

What is a useful industrial camera…

産業用USBカメラ
産業用レンズ
There are several standards for industrial cameras called C-mount, CS-mount, and S-mount.
Lenses that fit these mounts are separately prepared and mounted.
The ability to select lenses allows for a wide variety of options, such as the area to be projected and the distance the camera needs to be away from the object.
In addition, the number of pixels of the lens can be selected to match the number of pixels of the camera, resulting in a clearer image.

How to choose an industrial camera

Industrial cameras:
1.USB camera
2.GigE camera
3.UVC camera
4.HDTV
5.High-speed camera
There are various types, such as the following, to choose from depending on the application.
Industrial cameras are chosen in industrial and industrial settings because they offer a very high degree of freedom in terms of the images that are projected.


Shodensha’s Industrial USB Camera
産業用USBカメラ産業用USBカメラ産業用USBカメラ産業用USBカメラ


INDUSTRIAL CAMERA SELECTION

There are various types of industrial cameras such as USB cameras, GigE cameras, and Hi-Vision cameras.
In this issue, we will introduce the advantages and disadvantages of each connection method.


■USB camera


産業用USBカメラ

 
It can be connected to a PC via a USB port and used for a variety of applications.
It is the most standard industrial camera used in a variety of situations.
 
<Merits>
High versatility and easy connection.
Low cost.
Many applications (software) for USB cameras are available, so you can choose the application according to what you want.
High frame rate is possible by selecting USB3.0 type.
Wide lineup of cameras with different pixel counts.
 
<Demerits>
Short for cable.
Depends on PC specs.


■GigE Camera


GigEカメラ

 
The camera is connected to a PC using a LAN port, making it similar to a USB camera.
The use of a LAN cable ensures stable communication and long-distance connection.


<Merits>
 
Long cable lengths, 100 m for LAN, and even longer distances with optical fiber.
Communication is stable and noise-resistant.
Operable at a frame rate equivalent to USB 3.0.
 
<Demerits>
 
Need to provide a POE interface for connection.
Few applications are as versatile as USB cameras.


■HDMI Camera


HDMIカメラ

 
It can easily project images without the use of a PC.
It is specialized for monitoring and has excellent color reproduction of video images.


<Merits>
 
Directly connected to the monitor for easy use.
Some types of cameras are loaded with memory and come with a measurement function, allowing measurement without a PC.
High color reproducibility and frame rate make them ideal for monitoring such as inspections.
Some models have high camera sensitivity, so they can be combined with borescopes.
 
<Demerits>
 
If you want to add functions later, you need to buy new hardware.
External equipment may be required to save still images.


産業用カメラの選び方


Shodensha’s industrial camera


産業用USBカメラ
USB camera
GigEカメラ
GigE camera
計測機能付きハイビジョンカメラ
HDTV with measurement function
低価格ハイビジョンカメラ
Low-cost HDTV

SONY CMOS SENSOR IMX265

SONY CMOS sensor IMX265


The pixel size of this IMX265 is 3.45 x 3.45μm, and it is a global shutter type sensor.

Sony’s Pregius series is known for its high sensitivity and low noise.

The resolution is 3.2 million pixels and the sensor size is 1/1.8 inch, so there are many lens options. It can be said that this model has a good balance between image quality and frame rate (speed).


SONY CMOS sensor IMX265 specifications


Number of pixels: 3.2 million pixels (resolution: 2048 x 1536)

Pixel size: 3.45×3.45µm

Sensor size: 1/1.8 inch

Shutter method: Global shutter method


GigE camera (Sony 3.2 million pixels, color) EG320-C

IMX265

GigE camera (Sony 3.2 million pixels, monochrome) EG320-B

IMX265

SONY CMOS SENSOR IMX287

SONY CMOS sensor IMX287


The pixel size of this IMX287 is 6.9 x 6.9μm, and it is a global shutter type sensor.

SONY’s Pregius series is known as a high-speed sensor. If you are using the CCD sensor ICX618, as a transition to a CMOS sensor, this IMX287 has a similar pixel size and resolution, minimizing changes to peripherals such as lenses.

Furthermore, despite the low price, the sensor performance has been significantly improved.

SONY CMOS sensor IMX287 specifications


Number of pixels: 400,000 pixels (resolution 720 x 540)

Pixel size: 6.9×6.9μm

Sensor size: 1/2.9 inch

Shutter method: Global shutter method


USB3 Vision camera
(USB3.0, 400,000 pixels, color) CS41-C

IMX287

USB3 Vision camera
(USB3.0, 400,000 pixels, monochrome) CS41-B

IMX287
   

GigE camera (400,000 pixels, color) EG41-C

IMX287

GigE camera (400,000 pixels, monochrome) EG41-B

IMX287

USB2.0 CABLE EXTENSION

The USB2.0 standard usually recommends a length of up to 5m.

However, in reality, cables that exceed this length are sold by major manufacturers. (Generally speaking, it is said that there is no significant effect on communication speed up to about 10m).

In addition to simple extension cables, USB cables with repeater functionality are also available. These are also commonly referred to as active cables.

Multiple companies sell these products, but the product in the photo is Sanwa Supply Co., Ltd.’s KB-USB-R212 [12m extension USB active repeater cable].

12m延長USBアクティブリピーターケーブル


According to USB cable standards, the maximum connection distance between devices is usually 5 meters. However, by using this “USB cable with repeater function”, you can connect devices with a cable longer than 5m. The product in the photo can be extended up to 12m using this cable.


This cable has a built-in signal amplification correction circuit. This circuit compensates for signal attenuation and allows cable extension. This cable can be extended over 12m. In that case, wire as shown below.

信号増幅補正回路が内蔵


I tried connecting a 12m USB cable with repeater function (product in the photo) and the cable (1.8m) that came with the camera to our USB camera, and it worked without any problems. However, the instruction manual for the USB cable with repeater function (product in the photo) states, “To ensure stable operation and recognition, we recommend that the connected USB device be a self-powered device.” there was.

Of course, there are also active cables that use USB power (bus power). It is convenient and does not require a power supply, but if your PC’s power supply is weak, stability may be a problem.

Extending the USB cable will cause a voltage drop, so we recommend that you always check the operation when using devices that are powered by a PC (including our USB cameras).

HOW TO CHOOSE A COMPUTER WHEN USING MULTIPLE CAMERAS?

If you want to use multiple cameras, you need a high-performance PC. (The use of laptops is not guaranteed.) In general, as the resolution and number of cameras increase, so do the required specifications of the PC. The following are recommended specs, but this is a guide.

CPU: 12th generation or later Intel Core i7 (12th generation or later Intel Core i9 is recommended for 4 or more cameras)

RAM: 16 GB or more


If you’re recording for a long time, add the above specs to a GPU like the RTX 3070.

If you have more than 4 cameras, we recommend adding a USB board or a LAN board for GigE cameras to account for bandwidth limitations. To add a board, the required PCIe slot must be free.

Also, the amount of storage space you need depends on your camera’s resolution, fps, and recording time. The following is an estimate of the storage time that can be stored on each camera when using 1TB of storage.


1TB SSD

400,000 pixels 30fps Compression 160h
Non – compression 6h45min
1.3 million pixels 30fps Compression 48h
Non – compression 2h
5 million pixels 30fps Compression 11h
Non – compression 28min


※If there are 2 cameras, the time will be 1/2, and if there are 4 cameras, the time will be 1/4. When performing compressed recording, it may be possible to secure sufficient writing speed with an HDD depending on the number of cameras and fps.


WHAT IS “SYNCHRONOUS RECORDING” WHEN SHOOTING VIDEO WITH MULTIPLE CAMERAS?

When recording with multiple cameras at the same time, there may be a deviation of several frames between cameras due to factors such as camera clock and component deviations, aging, and the ambient temperature at which they are used.

Due to the complex interplay of these factors, it is difficult to give a specific amount of deviation, but as a general guideline, if you record for more than 8 hours, there may be a deviation of about 1 to 2 seconds.

Synchronous recording is a method that completely eliminates the above deviations and makes recordings without deviations. Synchronous recording uses not only a camera, but also a synchronous signal generator.

Multiple cameras are fed into the signal from the synchronous signal generator at exactly the same time, and only the frame at the time when the signal is entered is recorded, resulting in perfectly synchronized recording and not being affected by the camera clock or environment.

Multi-unit video recording software 
Evidence: Rec4 / Rec8

Software that allows “multiple cameras” to record “simultaneously” is ideal for creating evidence and evidence of problems that arise in the field.

同期録画

Fully synchronized recording set for USB/GigE cameras with multiple units (long-term recording software)
HiTriggerSyncRec2

Software that enables “fully simultaneous and synchronous recording” with “multiple cameras” is also available.

同期録画

USB/GigE Camera Fully Simultaneous and Synchronized Facility Monitoring Drive Recorder
HiTriggerSyncWatcher2 

Software that enables “fully simultaneous and synchronous recording” with “multiple cameras” is also available.


HOW TO ATTACH A SMALL S-MOUNT LENS TO A C-MOUNT/CS-MOUNT CAMERA?

Due to space constraints, it may be necessary to configure the camera and lens in a compact manner.

In such cases, compactness can be achieved by choosing an S-mount lens that is smaller than a C-mount or CS-mount lens.


Sマウント Cマウント


In order to use S-mount lenses, you need to attach a conversion adapter to the camera.


Sマウント Cマウント


However, there is a caveat.

With S-mount lenses, the focus is adjusted depending on how well it is inserted into the camera.

Cameras usually have an infrared cut filter or a protective filter in front of the sensor.

In some cameras, the distance between the filter and the lens mount is close, and the lens may interfere with the filter when focusing, resulting in a lack of focus.


It is necessary to actually try and check whether the S-mount lens can be attached and used with the camera.


CAMERA IMAGE SIZE (IMAGE SENSOR SIZE)

How to use the image sensor size?

When using the same lens, the smaller the size of the image sensor, the narrower the field of view. In addition, the size of the image sensor is a necessary factor in the calculation of the field of view and the selection of the lens. (More on this later.) 

The size of a single pixel can also be calculated from the size of the image sensor

For example, if the image sensor size of 1.3 million pixels (1280 dots × 1024 dots) is 1/2.5 inch, the horizontal orientation is 5.6 mm and the vertical direction is 4.2 mm.

In this case

Horizontal 5.6mm/1280dot=0.0044mm/dot

Vertical direction is 4.2 mm/1024 dot = 0.0041 mm/dot.


Meaning of image sensor size


Usually, when we say size on a monitor, we are referring to the length of the diagonal.

However, the size of the image sensor is not the length of the diagonal.

For example, in the 1/2.5-inch image sensor with 1.3 million pixels mentioned earlier, the horizontal direction is fixed at 5.6 mm and the vertical direction is fixed at 4.2 mm.

If we calculate from this figure, then the diagonal length will be 7 mm. But the actual diagonal length of 1/2.5 inch is 10.16mm.

This is due to the influence of the size notation of the diameter of the imaging tube in the era when vacuum tubes were used in the past, and the image sensor is also matched to the size of the imaging tube, and that notation remains as it is.


Actual image sensor size

4:3 horizontal and vertical image sensor


水平、垂直が 4:3の撮像素子


19:6 horizontal and vertical image sensor


水平、垂直が 16:9の素子サイズ


Actual use of image sensor size

When choosing a lens or calculating the distance to an object, the size of the image sensor is required.


(1) In the case of a CCTV lens (fixed focal length lens)


The following factors are required to calculate the required lens based on the size of the object: the size of the camera’s image sensor and the distance to the object (W.D.).

 
CCCTVレンズ(固定焦点レンズ)の場合


For example, if the distance to the object is 1 meter and the vertical field of view is 300 mm, what focal length lens should you choose? (Let’s assume we use a 1/2 inch camera).

The image sensor size of a 1/2 inch camera is as follows.

 
1/2インチカメラの撮像素子サイズ


Focal length (f) = (distance to object (mm) x vertical size of image sensor (mm)) / vertical field of view = (1000mm x 4.8mm) / 300mm = 16mm

Therefore, choosing a lens with a focal length of 16mm will ensure the desired vertical field of view. Horizontal field of view can be calculated similarly.

Note that once you know the vertical or horizontal field of view, you can easily calculate the other field of view. A square image sensor has an aspect ratio of 4:3, so in the above case, the horizontal field of view is 300mm x 4/3 = 400mm.


(2)For macro lenses


Lenses that magnify objects often have a fixed focal length.

In this case, the characteristics of the lens cannot be expressed by the focal length (f value).

In the case of microlenses, performance is expressed in terms of optical magnification.


With a lens with an optical magnification of 1x, the field of view you want to observe matches the size of the image sensor.

For example, the size of a 1/3 inch image sensor is 4.8 mm x 3.6 mm, and the size of a 1/2 inch image sensor is 6.4 mm x 4.8 mm. We would appreciate it if you could check the specifications of our macro lenses based on this information.

マクロレンズ
 

The size of the image sensor is also used to calculate the total magnification (the final magnification displayed on the monitor) when using a macro lens.

For details, see “How to consider the magnification of a microscope.”

<List of industrial cameras to choose from based on image sensor size>

  USB camera CS series USB camera DN series GigE camera
1/1.1 inch

CS1200-GC (12 million pixels, color)/

CS1200-GB (12 million pixels, monochrome)


EG1200-GC (12 million pixels, color)/

EG1200-GB (12 million pixels, monochrome)

1/1.7 inch

CS1200-C (12 million pixels, color)/

CS1200-B (12 million pixels, monochrome)


EG1200-C (12 million pixels, color)/

EG1200-B (12 million pixels, monochrome)

1/1.8 inch  

DN3RG-130 (1.3 million pixels, color)/
DN3RG-130BU (1.3 million pixels, monochrome)

DN3RG-200 (2 million pixels, color)/
DN3RG-200BU (2 million pixels, monochrome)

EG320-C (3.2 million pixels, color)/

EG320-B (3.2 million pixels, monochrome)

EG600U-C (6 million pixels, color)/

EG600U-B (6 million pixels, monochrome)

1/2.3 inch   DN3R-1000 (10 million pixels, color)  
1/2.5 inch CS500-C (5 million pixels, color)/
CS500-B (5 million pixels, monochrome)
DN3R-500 (5 million pixels, color)  
1/2.9 inch

CS41-C (400,000 pixels, color)/

CS41-B (400,000 pixels, monochrome)


EG41-C (400,000 pixels, color)/

EG41-B (400,000 pixels, monochrome)

1/2 inch

CS130U-C (1.3 million pixels, color)/

CS130U-B (1.3 million pixels, monochrome)

CS500U-GC (5 million pixels, color)/

CS500U-GB (5 million pixels, monochrome)


EG130U-C (1.3 million pixels, color)/

EG130-B (1.3 million pixels, monochrome)

1 inch

CS2000-C (20 million pixels, color)/

CS2000-B (20 million pixels, monochrome)


EG2000-C (20 million pixels, color)/

EG2000-B (20 million pixels, monochrome)

2/3 inch    

EG501-C (5 million pixels, color)/

EG500-B (5 million pixels, monochrome)


Summary

The size of the image sensor is information necessary for calculating the field of view and selecting a lens. For CCTV lenses, use the following formula when calculating the lens for the desired vertical field of view:

f value = (distance to object (mm) x vertical size of image sensor (mm)) / vertical field of view

For macro lenses, the size of the image sensor is used to calculate the total magnification that will ultimately be displayed on the monitor.

WHAT IS THE FLICKER PHENOMENON?

The “flicker phenomenon” refers to a phenomenon in which abnormalities such as “light and dark fluctuations” and “color tone shifts” appear in images captured by a camera, although they cannot be detected with the naked eye.

In this article, we will introduce “What is the Flicker Phenomenon” and “How to Mitigate the Flicker Phenomenon”.


The flicker phenomenon is

Some lighting devices flash to match the power frequency, while others pulse as a dimming system.

Although the flashing of light cannot be felt with the naked eye, if the shutter speed of the camera is faster than the blinking cycle, abnormalities such as “light and dark fluctuations” and “color tone shifts” will occur in the captured image. This is the flicker phenomenon.

The flicker phenomenon occurs under lighting such as fluorescent lamps that emit periodic light, and does not occur under direct current lighting.

There are two main symptoms of flicker.

In a camera with a global shutter system, the entire image periodically repeats fluctuations in brightness.

On the other hand, with a rolling shutter camera, horizontal stripes may appear in the footage, which may appear to flow vertically.


< Flicker Phenomenon: Horizontal Stripes of Light and Dark in Rolling Shutter Cameras>

フリッカー現象


How to prevent flicker phenomenon

Basically, there are only three ways.

1. Use a direct current lighting system.

2. Set the shutter speed to be slower than the blinking speed.

3. Use a camera equipped with a “flicker-free function”.


1. Use a direct current lighting device.

It occurs under lighting that repeatedly emits periodic light, and does not occur in lighting with direct current lighting.


2. Set the shutter speed to be slower than the blinking speed.

The flicker phenomenon can be suppressed to some extent by adjusting the camera’s exposure time or shutter speed, but it cannot be completely eliminated. Even if the flicker seems to disappear, the light and dark are changing over a long period of tens of seconds or more. Especially when using a high-speed camera under fluorescent lighting, a significant flicker phenomenon occurs.


※ If the shutter speed cannot be adjusted on the camera side, the aperture of the lens can be adjusted to compensate for the lack of illumination with DC lighting to reduce the effect of pulse lighting relatively.


3. Use a camera equipped with a “flicker-free function”.

The “flicker-free function” is a function in which the camera automatically detects the flashing of the light source and releases the shutter at a timing that has little effect on the brightness and color tone.

To avoid the flicker phenomenon, use direct current lighting or strobe lighting synchronized with the camera shutter for high-speed camera lighting.

We offer a wide range of high-speed cameras and lighting equipment suitable for those applications, such as high-speed camera lighting and strobe lighting.

If you are suffering from the flicker phenomenon, please feel free to contact us.


CHU30  

Low-cost high-speed camera

(Color/ Monochrome)

CHU30-C-RS / CHU30-B-RS


CHU130EX  

High-Speed Camera

CHU130EX


SCH-SN48W  

 Simple Lighting for High-Speed Camera

SCH-SN48W


CH-SN_300  

 Strobe Lighting  CH-SN


STAND TO FIX A CAMERA WITH A WIDE FIELD OF VIEW

When using a camera with a wide field of view or a long operating distance, the support of the stand may be reflected.
In this case, adding a horizontal stay to a regular camera stand can avoid reflection.


カメラスタンド


カメラスタンド


The following camera accessories are also available at camera specialty stores.


カメラスタンド


If you would like to know more about our products, please contact our technical support.

HOW TO MAKE A CAMERA STAND WITH A LOAD CAPACITY OF 5 KG

The load capacity of the camera angle attached to the end of the flexible arm (FA100-M) manufactured by Shodensha is 5 kg.


By attaching this to the camera stand, it can be made into a 5 kg load-bearing type.
(A normal camera stand weighs 2 kg.)


In order to attach the camera angle for flexible arm to a 25mm dia. post, the following parts must be custom-made.
Since they are custom-ordered, the length can be manufactured according to your request.


Production Examples 
<Camera stand with a load capacity of 5kg

HIGH LOAD-BEARING CAMERA STAND

Camera mounting screws are common in most cases.
In many cases, thermographs and large high-speed cameras also share the same mounting screws.
If you are looking for a stand with a high load capacity, you can easily find one by looking for camera supplies.
Although dedicated equipment may be available, we will introduce an easier and less expensive way to take pictures.


Load capacity 5kg type


Load capacity 10kg type


Shodensha also has a custom-made camera stand with a load capacity of 5 kg.