DN3 series cameras (USB 3.0 specifications) can be used in most cases even when connected to a USB 2.0 terminal
by lowering the camera clock value to less than half of the maximum value.
The data transfer ability of USB2.0 increases the performance of the computer,
so if Bad Frame occurs even if you set the clock value to half of the maximum value,
try lowering the clock value.
sdsvtadmin
CAPACITY WHEN SAVING VIDEOS USING A USB CAMERA
The structure of the video is simply a “flipbook”.
What is used in each page of the “flipbook” is an “image.”
For example, with a resolution of 1920 x 1080 (full high-definition) and “30 frames/sec”, 1800 images are required in 1 minute.
If you made this into a video as is, it would be a huge file size of 15GB in 3 minutes.
Therefore, if you want to save it as an uncompressed file (extension AVI, etc.), it is common to use a resolution of around 640 x 480 (300,000 pixels).(Even so, the capacity will be about 1MB in 1 second.)
If you cannot lower the resolution, you must compress each image one by one using a compression algorithm called a codec to reduce the file size.
Currently, the commonly used “codecs” are H.264 and VP9.
The extension of video files compressed with H.264 is MP4, and the extension of video files compressed with VP9 is webm.
By the way, H.264 includes patents, so a license fee will be charged.
For this reason, there are very few free software that has a video recording function that can save videos as MP4 files.
(There seems to be a lot of uncompressed AVI.)
A video that is a series of still images taken at intervals is called a time-lapse, and is also expressed as time-lapse photography.
It is the exact opposite of video shot with a high-speed camera (slow-motion video), and is a video that was shot over a long period of time and played back in a short amount of time.
Therefore, unlike long-duration video recording, it is possible to record for a long time with a small amount of storage space.
Also, since each image is a still image, high-resolution photography is possible.
|
<Reference> Below is a sample time-lapse video on YouTube. https://www.youtube.com/watch?v=UQ_QqtXoyQw (It can be applied to photographing things that change slowly, such as the movement of microorganisms and tissue culture.) |
Shooting time-lapse videos is easy, even without special equipment.
How to shoot time-lapse
(1) Many cameras have a time-lapse shooting function, which makes it easy to take photos.
(2) You can also download a time-lapse compatible app and take pictures with your smartphone.
(3) Take interval shooting and save still images. Use editing software to create a time-lapse video.
How to create time-lapse videos using our products
When using our products, use method (3) above.
To take interval shots with our USB camera, we use our dedicated software Hi TriggerQ to take pictures of the object and save a large number of still images.
|
|
First, I took interval shots of the inside of my company using the software mentioned above.
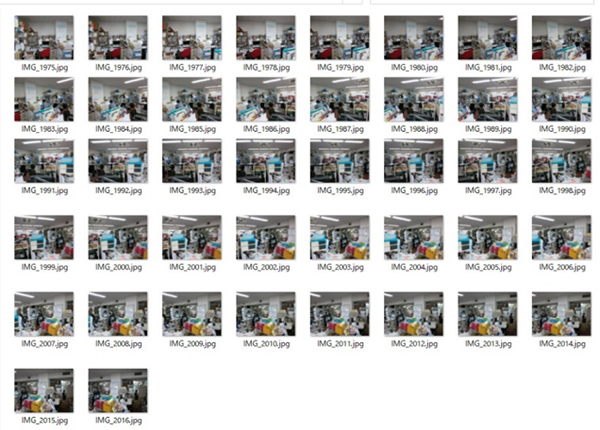
Use editing software to connect these to create a video.
There are editing software such as WindowsLiveMoveMaker, but this time I tried using the free software “Panolapse”.
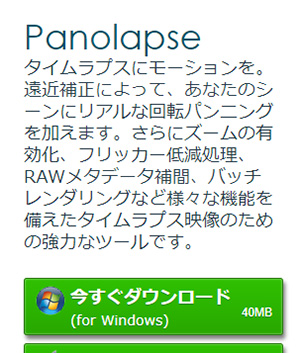
The free version has resolution limitations, so the resolution of still images has been lowered.
(Restrictions will be removed when you purchase a license.)
It will be downloaded in the following format.
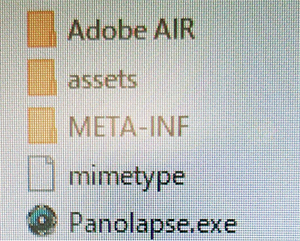
When you launch Panolapse.exe, a screen like the one below will appear.
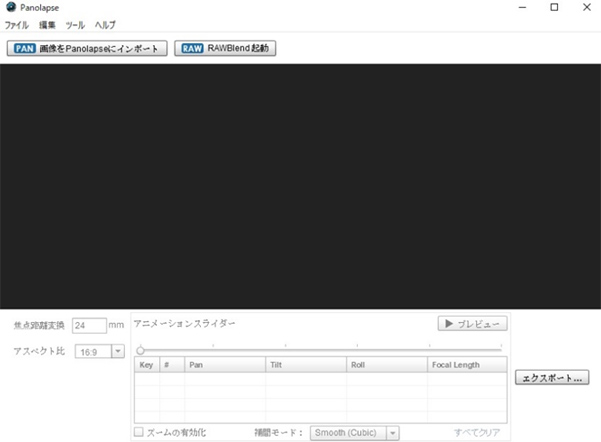
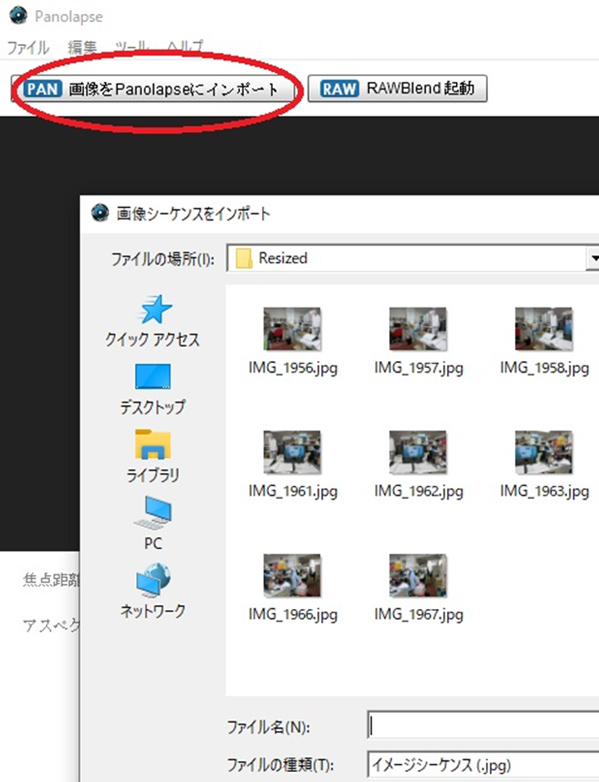
Click “Import to Panolapse” to import all the still images that were taken at intervals earlier.
Just click the preview button and it will become a time-lapse video.
※Please note※
Time-lapse editing software is not our product.
This will be introduced as an example.
IF THE CS/EG SERIES CAMERA DOES NOT ACHIEVE MAXIMUM FPS
If you are unable to achieve maximum FPS with our industrial cameras (CS/EG series cameras), please check the following items:
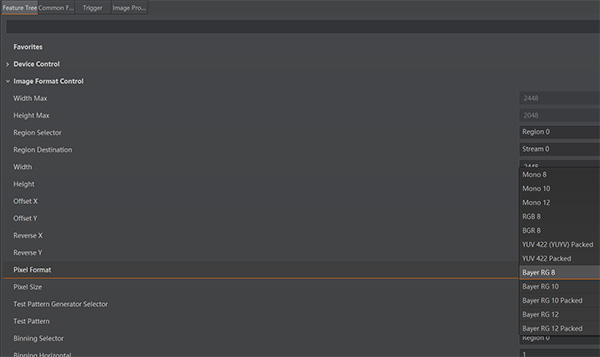
■ ■ Make sure that the pixel format is not set to RGB or YUV. (Common to CS/EG series)
The maximum FPS listed on our product page is the value when the pixel format is “Bayer 8bit”.
Here are two ways to change the pixel format to Bayer.
1)Use MVS
2)Use the program
By installing the driver for the CS/EG series camera, you can develop programs using the API.
Change the pixel format to “BayerXX 8” in the program.
(XX depends on the camera)
■ Are jumbo packets getting 9K? (EG only)
If you do not exceed 9K (9000 bytes), you will not get the maximum FPS.
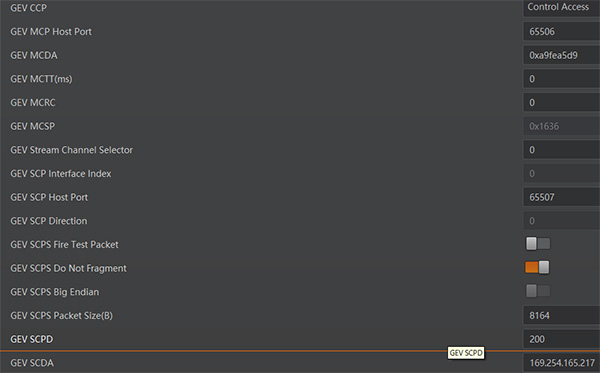
■ If the maximum FPS is not achieved after following the above steps (EG only)
Try setting “GEV SCPD” to “200” in MVS.
However, setting the value too low can result in packet loss.
「Feature Tree」→「Transport Layer Control」→「GEV SCPD」
8MM FIXED FOCAL LENGTH MOTORIZED FOCUS LENS (1.1 INCH, 12MP COMPATIBLE) DL0828UC-MPY
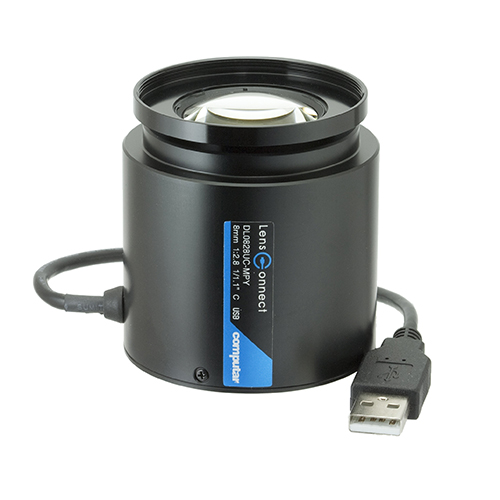
● Equipped with motor, control board, and USB communication function on the lens body
● You can connect to a PC (Windows / Linux) with a single USB cable to control focus adjustment and aperture adjustment.
● Can be used with general-purpose C-mount cameras (other companies’ C-mount cameras are also possible)
● 12MP compatible high-resolution lens
● Compatible with 1/1.1 inch large elements
● Lens control sample program is included as standard
※ We can develop a lens control program upon request.
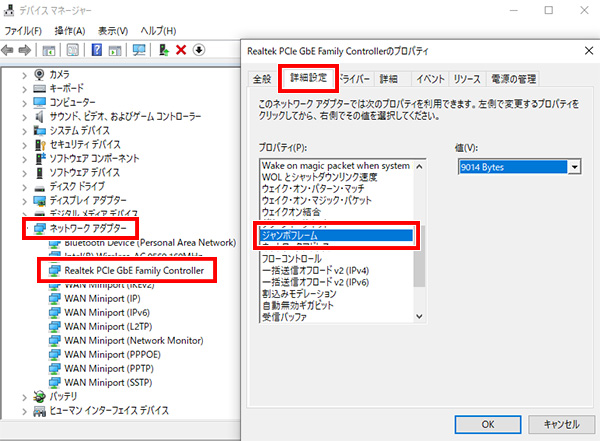
HOW TO CONFIGURE JUMBO PACKETS
Configuration Method 1: MVS
Our driver comes with MVS, which is installed to set 9K for jumbo packets on the NIC (Network Interface Card).
After installing MVS, the number of NICs may increase by adding PoE boards, etc. In that case, uninstall MVS and install it again, and the jumbo packet will be set to 9K.
|
Setting Method 2: Control Panel
To change the settings, follow these steps:
“Control Panel” → “Hardware and Sound” → “Device Manager”
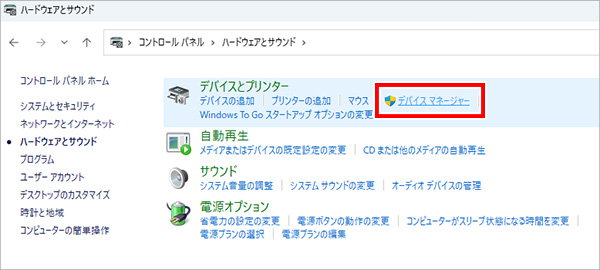
Double-click the network adapter that contains the NIC (Network Interface Card) to enter its properties interface.
Select the Advanced tab, select Jumbo Packets (Jumbo Frames), and make your changes.
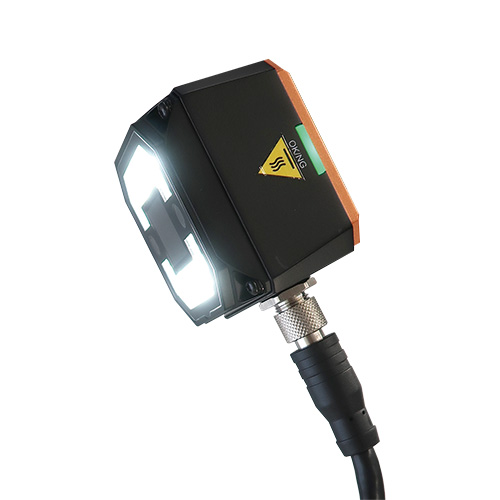
SMART CAMERA (COLOR, 6MM LENS) HS3016-06MC | VISUAL INSPECTION CAMERA
Leave the VISUAL INSPECTION to the camera!
With “one camera” and “4 easy steps”, a wide variety of judgments are possible!
● Full of convenient functions for visual inspection!
◊ Misalignment judgment
◊ Shape judgment
◊ Presence or absence judgment
◊ Color discrimination
◊ OCR function, etc.
● Lens / lighting integrated type! Easy start with one camera
● The waterproof and dustproof standard of the camera is IP67 compliant
※Power supply sold separately
※ LAN cable sold separately
HOW TO DISPLAY AND CONTROL IMAGES FROM MULTIPLE USB CAMERAS WITH ONE COMPUTER
There are two ways to display 2 screens or 4 screens (or more multiple screens) with a USB camera.
(1)A simple way to use it is to start multiple viewer software that can be started at the same time.
(2)Use software dedicated to displaying multiple screens.
1.Launch the viewer software at the same time.
It may also be possible with free software.
However, this may not be possible with the same camera, and stability may be lacking.
We recommend that you try it out before using it.
(Depending on the software, multiple startup itself may be prohibited.)
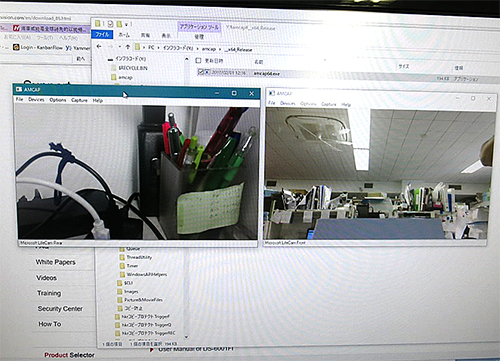
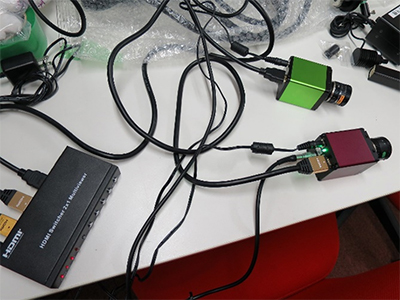
The following is a simple test at our company. (Operation is not guaranteed.)
I connected two of our cameras and started up a free software called Amcap multiple times to display two screens.
 |
 |
In the case of two-screen display, only the active screen (the left screen in the above example) can be operated,
so if you want to perform menu operations, you will need to switch screens.
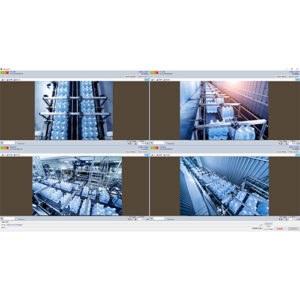
2.Use dedicated multi-screen display software.
The software is designed for multiple screen display, so it is stable.
Also, since there is only one menu, operations such as saving are easy.
The following is the multiple screen display software created by our company.
|
|
Multi-screen display |
Features of Hi TriggerQ
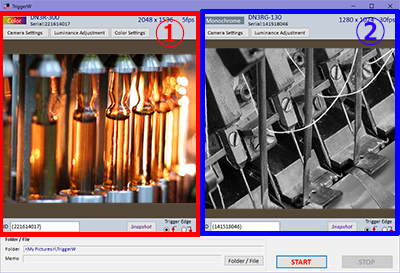
It is possible to control multiple cameras, observe both screens, and save images.
In addition to cameras of the same model number, combinations of different resolutions
and color/monochrome cameras are also possible.
Of course, you can also use it with one camera!
●While live monitoring video, still images from up to 4 cameras (uncompressed bitmap format/JPEG compressed format) can be saved using a trigger signal. (Please contact us if you would like 5 or more units.)
●Camera images are always displayed live. You can shoot while monitoring the video.
●Snapshot function allows you to take still images at any time You can also save still images with a mouse click regardless of the trigger signal.
You can save still images on the spot at any time, such as reference images or scenes of interest.
●You can take interval shots.
|
|
High-performance trigger shooting software |

Features of Hi TriggerF PRO4/PRO8長
●Save/pause still images (JPEG/BMP) using a trigger signal, just like pressing a camera shutter.
●Positioning and focusing can be done during live display.
●Supports up to 4/8 cameras (please contact us for more!)
MAXIMUM NUMBER OF STILL IMAGES THAT CAN BE SAVED USING AN EXTERNAL TRIGGER
It varies greatly depending on the frame rate of the USB camera.
If you use the viewer software that comes with our DN series, the actual measured frame rate will be displayed at the bottom.
(This is an actual value, not a theoretical value.)

In the example above, the actual frame rate is 41.94 frame/sec.
Approximately 90% of this value will be the maximum number of sheets that can be imported.
41.94×0.9=37.7. In this case, it is possible to save up to 37 images/sec.
However, two conditions are required:
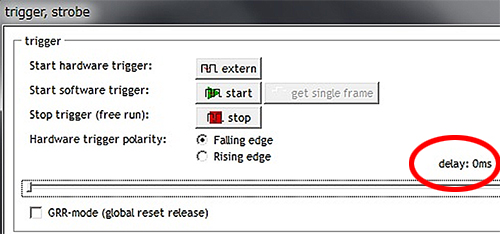
・There is no count up in the bad frame (blue circle) above.
・The delay time below must be 0ms.
You can increase the number of images you can capture by increasing fps.
・Lower resolution
・Increase the clock speed (as long as bad frames do not occur)
・Change USB2 to USB3
External trigger voltage specifications
・Input voltage is 3.3V to 24V.
・Please set the input pulse width to 5.1μsec or more.
・The delay from inputting an external trigger to starting exposure is several μsec.
HOW TO DISPLAY IMAGES IN PICTUREBOX INSTEAD OF IN A SEPARATE WINDOW (WHEN USING THE INCLUDED SDK)
How to display images in PictureBox instead of in a separate window (when using the included SDK)
If you use the SDK sample program as is, the video will be displayed in a separate window.
If you want to display it in a PictureBox within a Form, please refer to the page below in the API manual.
int iCube SDK_Start (int nCamIndex, HWND ImgHandle, bool Preview, bool Callback)
In the above function, the image will be displayed on the PictureBox by using the PictureBox handle in HWND ImgHandle.
Example:
DDX_Control(pDX, IDC_PIC, m_pic);
nStat=ICubeSDK_Start(g_iCurrentCam,m_pic,true,true);
Display an image to fit the size of the PictureBox:
Example:
DISP_PROPERTY disp_prop;
ICubeSDK_SetDisplayMode(nCamIndex,DISPLAY_FIT_TO_WINDOW, disp_prop);
WINDOWS EMBEDDED AND USB CAMERA
Windows Embedded is a general term for a family of operating systems developed and provided by Microsoft for embedded devices.
When it comes to embedded OS, what can be used or not depends on which drivers and functions are built into the OS.
Due to the above circumstances, I think that there are few USB cameras that officially claim to be compatible with Windows embedded.
However, if the embedded OS you are using has a driver that recognizes the imaging device, you can use the USB camera like a normal OS.
In fact, some customers are using our DN3 series.
 |
| USB3.0 camera DN3 series |
HOW TO DEAL WITH VIDEO FREEZES, EXTREMELY SLOW SPEED,… 1
One cause may be that the PC’s current supply is insufficient.
(Since it is not noise, repeater cables etc. cannot be used to deal with it.)
In particular, notebook PCs may have a low total amount of power supply or may be in power saving mode by default.
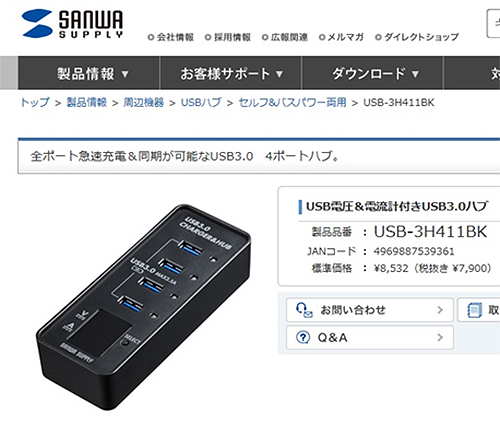
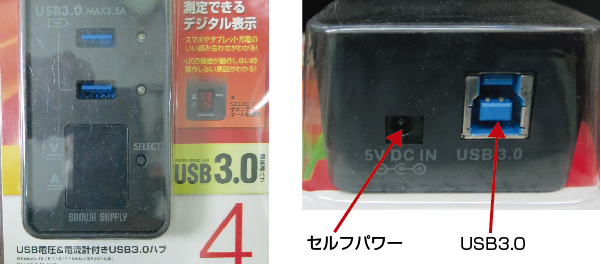
In this case, an easy solution is to use a self-powered HUB (HUB with an AC adapter).
The power supplied to the camera and active cable will now be supplied from the HUB, not the PC.
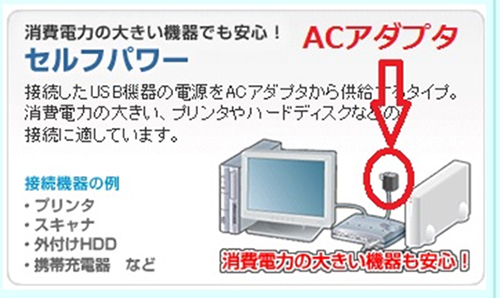
There are also self-powered HUBs with an ammeter as shown below.
HOW TO DEAL WITH “VIDEO FREEZES”, “SPEED IS EXTREMELY SLOW”, ETC. 2
Your PC’s C-State is at play, and this can sometimes cause problems.
Simply put, C-State is a function that puts the CPU into a low power state to save energy.
Therefore, the power supply from the USB is often insufficient, which can cause video delays or stuttering when using devices such as USB cameras.
Especially in Windows 10, C-State is enabled to extend battery life and save power.
C-State is different from power plan power saving mode.
If your power plan is set to Power Saver or Balanced and the issue persists even after changing to High Performance, you may need to turn off C-State.
C-State can be turned off from the BIOS, but since the BIOS description etc. differ depending on the manufacturer, it is not possible to clearly specify the procedure.
If you need to stop C-State, please contact us.
PRECAUTIONS WHEN USING THE HUB TO MOVE THE USB CAMERA
Basically, it is more stable if it is directly connected to the USB port of the PC.
(However, if the PC’s power supply is vulnerable, the self-powered HUB may be stable.)
There are a few things to keep in mind when using HUB.
1.Use USB3.0 HUB.
If you use the USB 2.0 type, it will not work normally.
However, if you adjust the number of clocks on the camera side, the video may be displayed.
However, it may cause abnormal behavior, such as extreme slowdown, or low-resolution cameras that show up but not high-resolution cameras.
2.As much as possible, use a self-powered HUB.
Especially when using a notebook PC, the power supply to the camera may be insufficient when using USB bus power, and abnormal operation may appear.
Of course, it depends on the power capacity of the PC side, so it may work just fine.
(Supplement)
Even if you choose a USB 3.0 self-powered HUB, you can see some HUBs that do not have USB 3.0 communication speed.
(Depending on the HUB, the communication speed may be reduced.)
In this case, abnormal behavior may occur, such as a low-resolution camera working but a high-resolution camera not working.
32BIT, 64BIT, WHAT’S THE DIFFERENCE?
“32bit” and “64bit” refer to the way in which a computer’s processor (also known as a CPU) processes information. A 64-bit version of Windows can handle large amounts of random access memory (RAM) more efficiently than a 32-bit system.
In the previous versions of Windows XP and Vista, it was 32-bit, with certain exceptions, so the camera was only compatible with 32-bit. However, from Windows 7, not only 32-bit but also 64-bit has become common. However, even if you send a 64-bit signal to a camera that only supports up to 32-bit by the element itself, it will not work. It is not possible to respond only by updating the software, and it is necessary to change the device itself to support 64bit.
Currently, all USB microscopes and USB cameras sold by our company are 64-bit compatible.
WHAT IS THE MINIMUM ILLUMINATION OF A CAMERA (MINIMUM SUBJECT ILLUMINANCE)?
The minimum illumination of the camera (minimum subject illuminance) is
It is the minimum illumination required by the camera to take pictures.
The lower the minimum illumination value, the better you can shoot in the dark.
If the minimum illumination is low, “a wide range of shooting can be done = the area where the image is displayed increases”
However, the image quality itself also depends on other factors of the camera.
The minimum illuminance of infrared cameras used for nighttime monitoring is 0 lux.
It does not use external light, but emits “infrared rays” that are invisible to the human eye.
In other words, you don’t need any illumination when shooting, and you can shoot in complete darkness.
On the other hand, the minimum illuminance of a high-sensitivity camera is less than 1 lux (0.1~0.002 lux),
Even with ultra-high-sensitivity cameras, the minimum illuminance is set very low at ~0.00001 lux.
Shooting in complete darkness is not allowed.
Also, in order to shoot as a video that can properly check the contents,
The illuminance is about 2.5~3 times higher than the minimum illuminance of the camera.
There is no particular uniform standard for the minimum illuminance value. It is important to note that the numerical values are given according to different measurement methods and standards for each manufacturer.
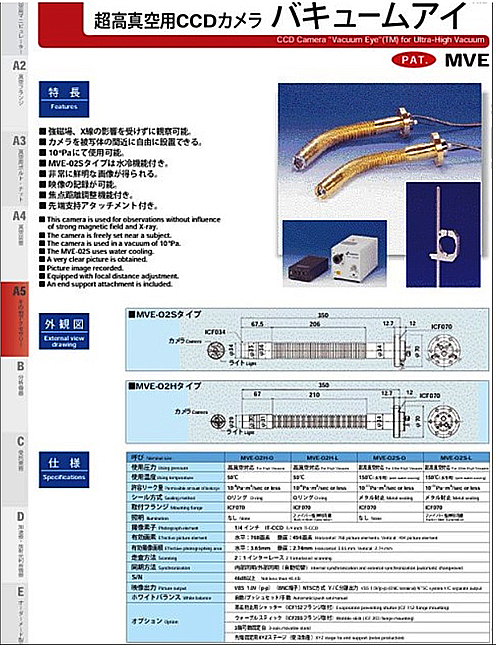
ULTRA HIGH VACUUM CAMERA
Ordinary C-mount cameras cannot be used for observation and monitoring under vacuum conditions.
Although it is not our product, it seems that the following ultra-vacuum cameras are also sold.
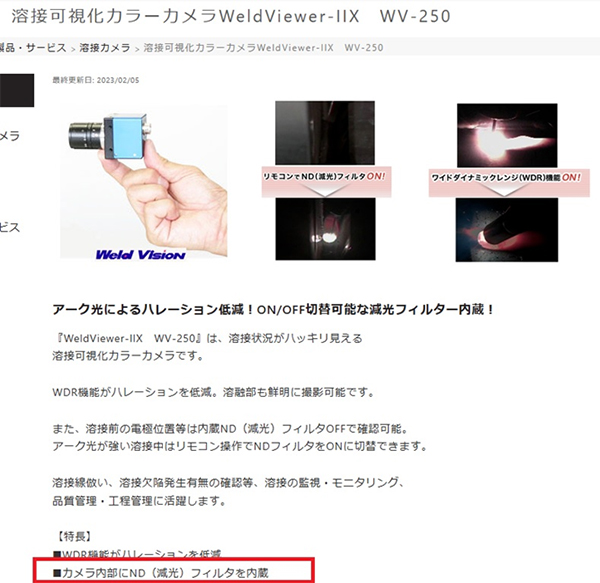
CAN AN INDUSTRIAL CAMERA RECEIVE LASER LIGHT?
In a typical industrial camera, strong light such as laser light or arc discharge light can cause the imaging sensor to cause burn-in.
Usually, when shooting strong light, a neutral density filter (ND filter) is used. ND filters are used to reduce the amount of light by a certain amount, regardless of wavelength.
ND filters on the market include ND4, ND8、…、 and ND1000. The number at the end indicates the dimming rate.
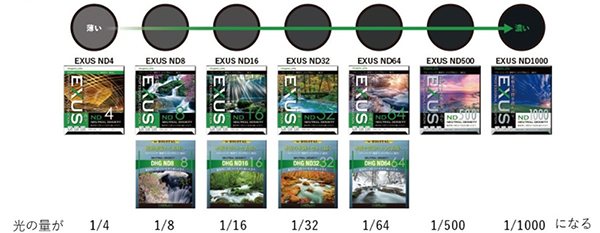
* If the level of the observation light is reduced to 1/1000, a commercially available product is sufficient.
Some cameras are designed for strong light. For example, a camera that observes strong arc light has a built-in ND filter on the body.
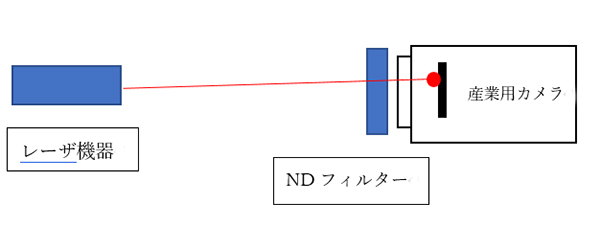
Depending on the intensity of the light, each manufacturer has its own ideas. One manufacturer adjusts the optical axis of a device with a built-in semiconductor laser (Class 3B) by attaching an ND filter to an ordinary industrial camera.
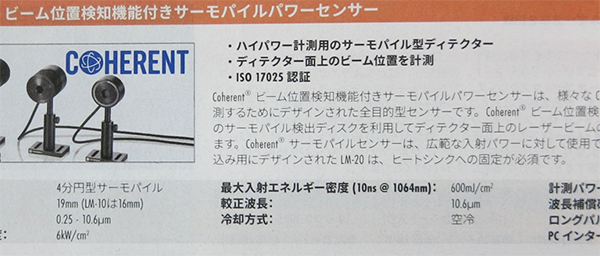
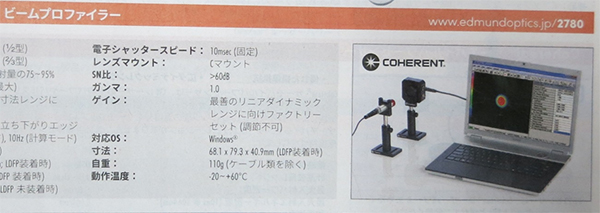
Of course, there are also dedicated measuring instruments for detecting the beam position.
When detecting beam position or measuring energy distribution such as lasers, it is recommended to use a dedicated measuring instrument instead of a general-purpose camera.
Some use cameras as measuring instrument systems, while others use sensors such as thermopiles or PSDs.
DOES THE CAMERA HAVE AN INFRARED FILTER?
Our cameras have infrared filters. Therefore, it is not possible to take a screen in the infrared region.
However, at the request of the customer, the infrared filter can be removed and shipped, so please contact technical support for details.
DOES THE CAMERA SUPPORT MONOCHROME?
Color cameras have a monochrome (black and white) mode, but there are also pure monochrome cameras (black and white cameras).
The monochrome mode of a color camera is usually converting a color image to monochrome.
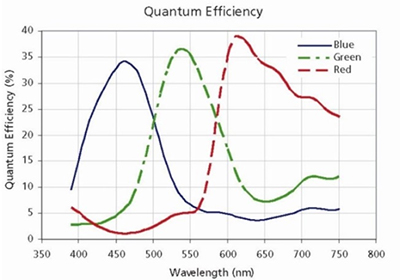
So what are the advantages of a pure monochrome camera? In general, monochrome is more sensitive than color cameras.
The high sensitivity is advantageous for adjusting the shutter speed and depth of focus. They also have different wavelength sensitivity characteristics. The sensitivity of the sensor itself can also change significantly.
Example of spectral characteristics of a color camera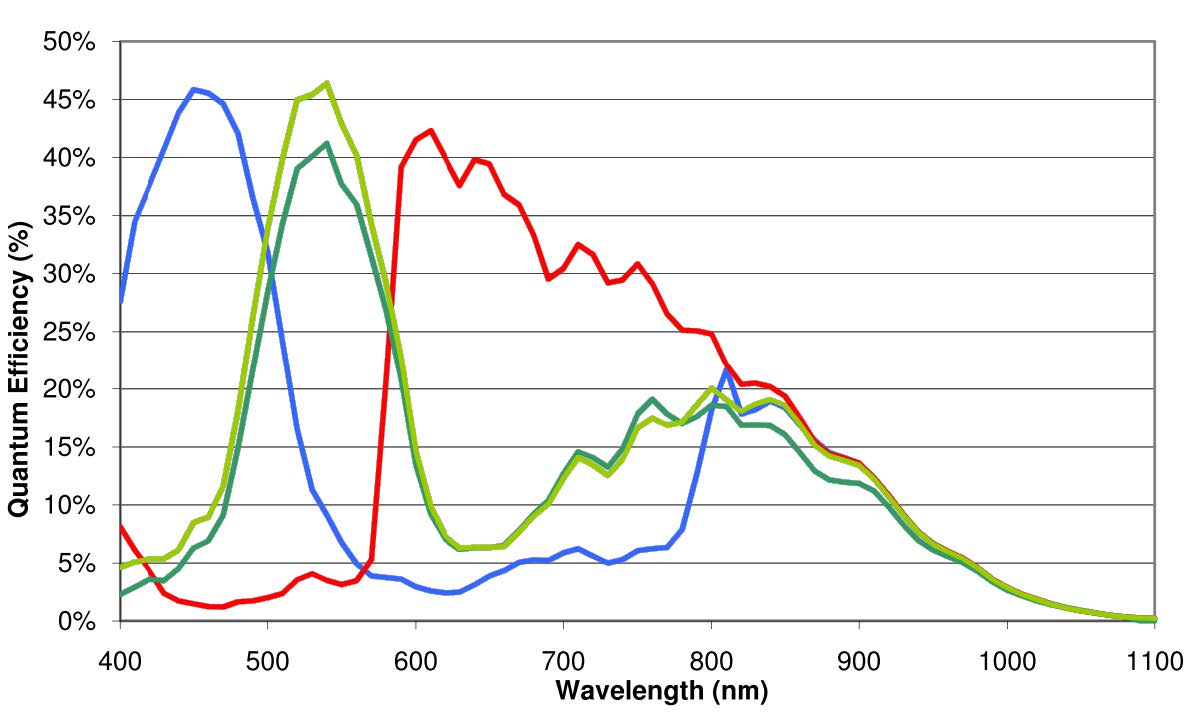 |
Example of spectral characteristics of a monochrome camera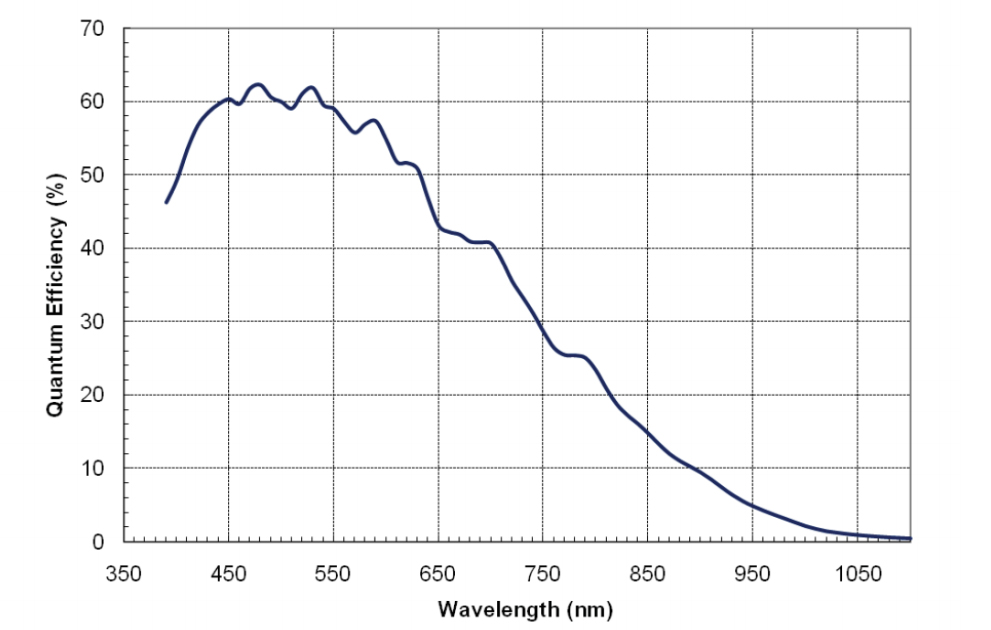 |
Example of filter characteristics of a color camera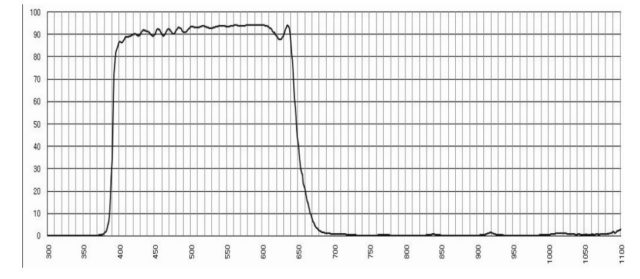 |
|
WHAT ARE APIS AND SDKS?
API is an abbreviation for Application Programming Interface. It is an interface designed to facilitate the programming of applications, allowing for the concise creation of programs.
SDK refers to the Software Development Kit.
We currently release the SDK for some models, but not for some models.
Cameras for which the SDK is available include the DN series (USB cameras), the CS series (USB cameras), and the EG series (GigE cameras).
As for the DN series, you can also create programs using the DirectX SDK provided by Microsoft.
In particular, the DN3UVC series can be programmed using the API of the UVC standard.
USB CAMERA HEAT RESISTANCE
The environmental resistance of a typical C-mount camera is as follows:
・Temperature: 0°C~40°C
・Humidity 35%~85% (no condensation)
A separate cooling system is required to ensure a certain level of heat resistance.
We do not handle it, but it seems that there is a simple environment-resistant camera at the level of 60°C~100°C.
(If it goes beyond this, it seems that it will be almost custom-made.)
If it is a GigE camera instead of a USB camera, it seems that an environmentally resistant camera can also be used. Below is the
Temperature: -40°C~85°C
Humidity 10%~90% (no condensation)
HOW TO CHOOSE A UVC CAMERA
There are two main types of UVC cameras that we handle.
About DN series
DN series cameras are a higher type than general UVC cameras.
There are two points at the top.
The first one comes with a trigger terminal.
Very few UVC cameras come with a trigger terminal, but industrial USB cameras generally come with a trigger terminal.
This function was added in response to a request to use the UVC camera like an industrial camera.
The other comes with a tool program that allows you to remember camera settings such as white balance.
The brightness and color adjustment of UVC cameras are basically set to automatic and cannot be adjusted, but he can save the adjustments by using a tool program.
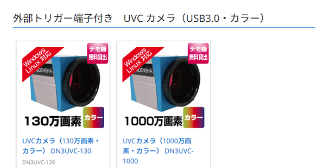 |
UVC camera with trigger terminal |
About WA2 series
The WA2 series camera is a price-oriented type.
All that can be done is the same control as a general web camera.
The advantage over web cameras is that they are C-mount, so lenses can be replaced.
I think it will meet your needs such as “A web camera is sufficient, but the angle of view is not suitable.”
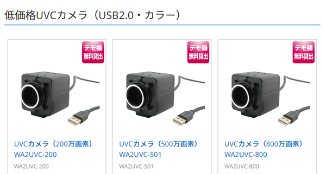 |
Low price UVC camera |
Recommend
Basically, the DN series is recommended because it can do more things than the WA2 series.
It can be adapted to various conditions.
If you want to build it cheaply, please choose the WA2 series.
ABOUT UV (ULTRAVIOLET LIGHT) OBSERVATION
In order to perform UV (ultraviolet light) observation, you need a camera that is sensitive to UV and a lens that is UV-compatible.
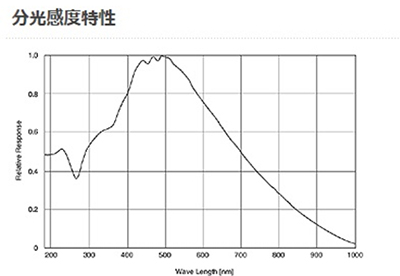
Our cameras are mainly intended for visible light observation and are not sensitive in the ultraviolet region.
As shown below, there is no sensitivity in the ultraviolet region.
UV observation can be broadly divided into two types.
(1) When observing scratches, stains, unevenness, etc. on the surface of an object
(2)When observing the faint fluorescence phenomenon of an object
When choosing a camera, you should focus on one of these uses.
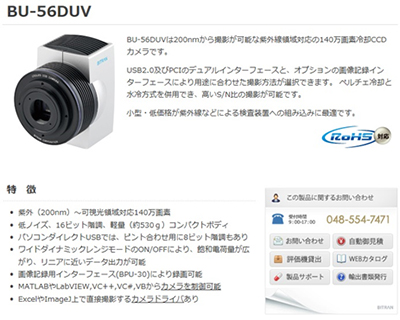
(1) When using a camera sensitive to ultraviolet rays
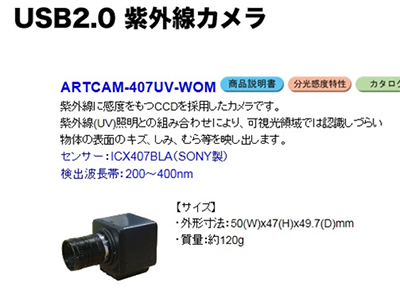
(2) In order to capture not only ultraviolet light but also weak fluorescence phenomena, a cooled CCD camera is generally used.
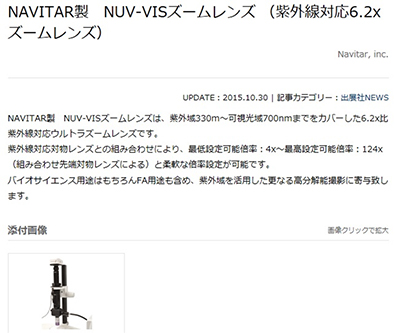
Also, the lenses must be UV compatible.
(The following is an example of a zoom lens made by Navitar in the US.)
WHAT IS A GIGE CAMERA?
GigE camera is an abbreviation for Gigabit Ethernet camera.
No expensive dedicated board is required, and a general-purpose Ethernet cable can be used.
The port to connect is also a LAN port.
However, a power source is required to drive the camera.
<Connection example>
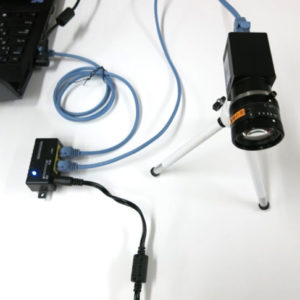
The price is the same as a USB camera, but the feature is that the cable can be extended (up to 100m).
There is also stability in communication.
The initial settings (environment settings) are a little more complicated than a USB camera, but once connected, the communication stability is higher than that of a USB camera.
Shodensha GigE camera
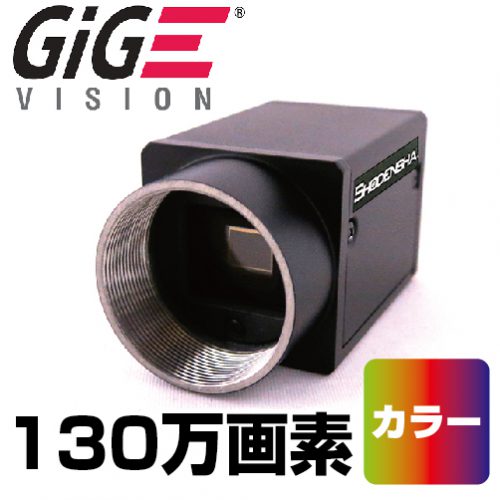 |
GigE camera (1.3 million pixels, color) |
|
|
|
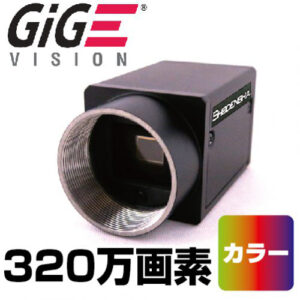 |
GigE camera (Sony 3.2 million pixels, color) |
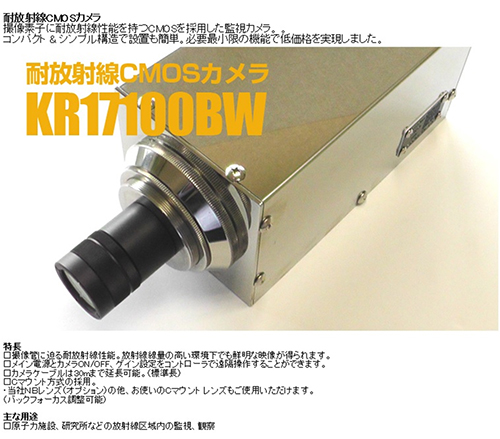
RADIATION-TOLERANT C-MOUNT CAMERA
Ordinary C-mount cameras are not suitable for observation and surveillance within radiation zones such as nuclear facilities and laboratories. In particular, it is necessary to use sensors that are resistant to radiation.
Although it is not our product, it seems that cameras equipped with CMOS sensors that are resistant to radiation are also sold.
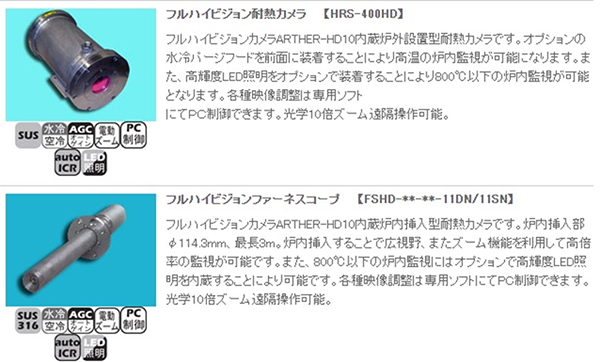
ABOUT HEAT-RESISTANT PHOTOGRAPHY
Since a typical camera is an electronic device, its usable temperature range is usually limited to around 40℃ to 50℃.
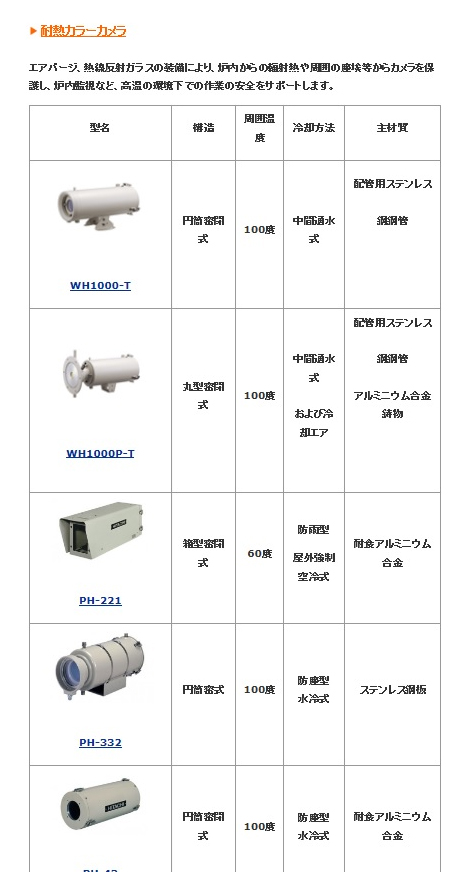
■ Heat-Resistant camera
There are also specialized manufacturers of cameras that feature heat resistance.
The following cameras are from Security Japan.
However, when using a regular heat-resistant camera, air cooling or water cooling equipment is required separately, which significantly increases the price.
GIGE CAMERAS ARE NOT DIFFICULT!
●What is a GigE camera?
When looking for industrial cameras, USB cameras and GigE cameras often come up.
When you hear a USB camera, you probably imagine a camera that connects to a computer via USB.
Many people may not have an image in mind when they hear the word GigE camera.
A GigE camera is a camera that connects to a computer using a LAN cable.
USB requires that the distance to the computer be 3 meters or less,
but GigE cameras can use a LAN cable and can be built even if the distance to the computer is 100 meters.
●Frequently asked questions about GigE cameras
Here’s something for those with a little more knowledge to think about.
If you connect it to your computer using a LAN cable
・How should I supply power to the camera?
・Does it seem like it takes a lot of effort to obtain an IP address?
I think there are many people who have this question.

●Power supply to GigE camera
Regarding power supply for GigE cameras, there is an option called POE power supply that can supply power to the camera.
If you use this together, you can power the camera with a LAN cable.
Connect the camera and POE power supply with a LAN cable as shown in the diagram below.
POE power is supplied using an AC adapter.
Connect the POE power supply and computer with a LAN cable.

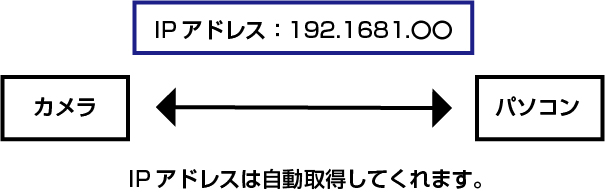
●Is it necessary to obtain an IP address with a GigE camera?
Our GigE camera basically does not need to obtain an IP address when connecting to a computer.
Our GigE camera supports DHCP.
DHCP is a system that allows devices newly connected to an IP network such as the Internet to
Communication rules for automatically assigning setting information necessary for communication such as IP addresses.
Therefore, by connecting our GigE camera to a computer, it will automatically select and use unused IPs.
Therefore, you can use the camera without making detailed IP address settings.
*If DHCP cannot be used due to computer settings, you can also set a static IP address.
●Summary
As mentioned above, our GigE camera can be easily connected to a computer.
Building a GigE camera is not difficult.
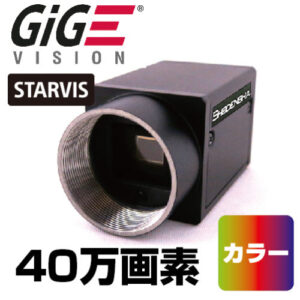 |
GigE camera From 400,000 pixels to 20 million pixels We have it in stock. GigE camera EG series |
ABOUT THE LAN PORT FOR CONNECTING GIGE CAMERAS
The port that connects the GigE camera is a LAN port.
However, the LAN port attached to a normal PC does not have a power supply line.
(Of course, a power source is required to operate the camera.)
There are two methods when using a GigE camera.
1. Prepare a separate power supply for the camera.
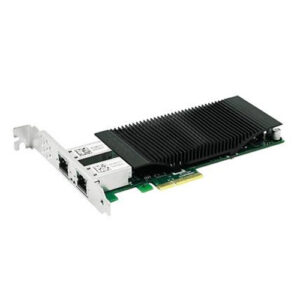
2. Prepare a NIC for PoE (Power over Ethernet) interface (LAN port with power supply line).
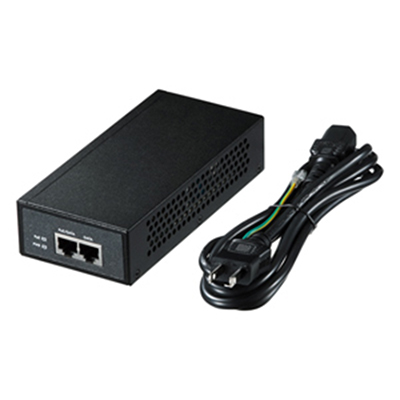
1.
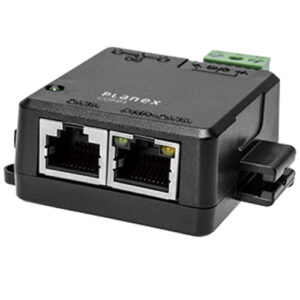
| There is no problem if the camera comes with an AC adapter, but there are also devices on sale that add a power supply function by inserting it between the PC and the camera. It is called a PoE injector. It can be purchased from PC peripheral manufacturers (Elecom, Sanwa Supply, Buffalo, etc.). |
 |
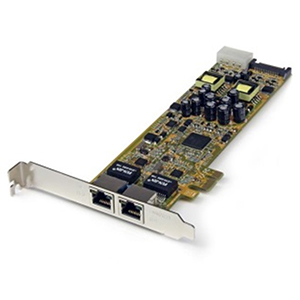
2.
| NIC is an abbreviation for Network interface card and has the same meaning as LAN board, and indicates an expansion board. As mentioned above, the standard LAN port of a normal PC does not have a power supply line. Therefore, it is necessary to add such an expansion board (card) to the PC. |
 |
In addition to this, there are also the following that can be used with laptops, etc.
If you want to run multiple cameras on one PC, you can use the following options.
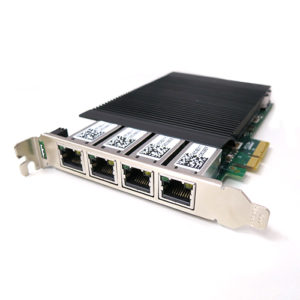 |
GigE Vision frame grabber board (4 ports, with POE power supply) EG-IB4 |
HOW TO VIEW IMAGES FROM MULTIPLE HDMI CONNECTED CAMERAS ON ONE MONITOR
If you want to view images from a direct-monitor type camera on one monitor at the same time, you will need a device called a “splitter”.
We would like to introduce some of them.
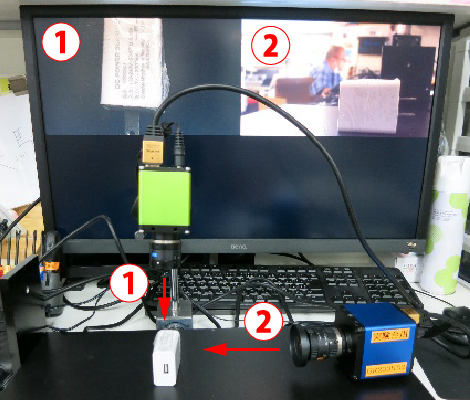
1. Connecting 2 high-definition cameras (single-function type)
It is very simple to use and supports up to 2 cameras.
*Manufacturer model number: YHD-M21

There are two modes that you can switch between.
●Mode to use the screen in half
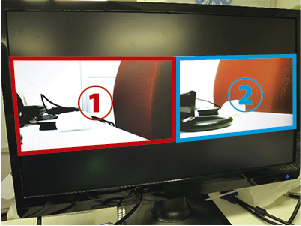
●A mode that displays the image from one camera to fill the screen and displays the second camera in a smaller size.
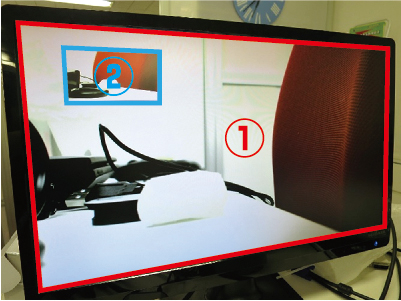
This product is also sold by our company.
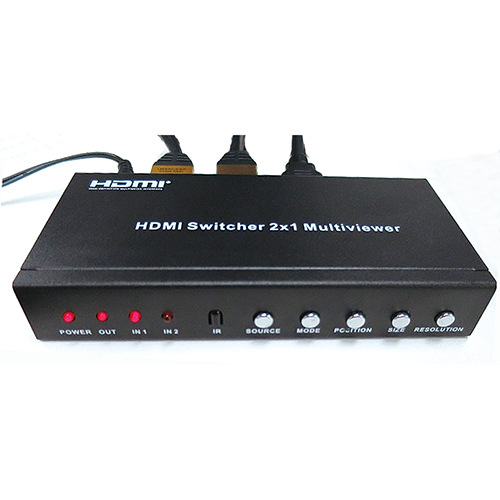 |
2-screen split multiviewer switching device |
2. Connecting 4 high-definition cameras (high-performance type)
Images from four high-definition cameras can be displayed simultaneously on one monitor.
*Manufacturer model number: CDPS-41SQN
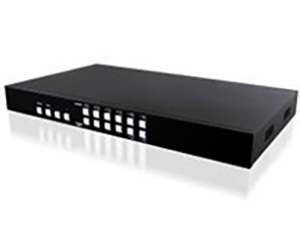
It can connect up to 4 cameras and has various functions.
(Example of use) The top and side surfaces of one object can be inspected at the same time.
This product is also sold by our company.
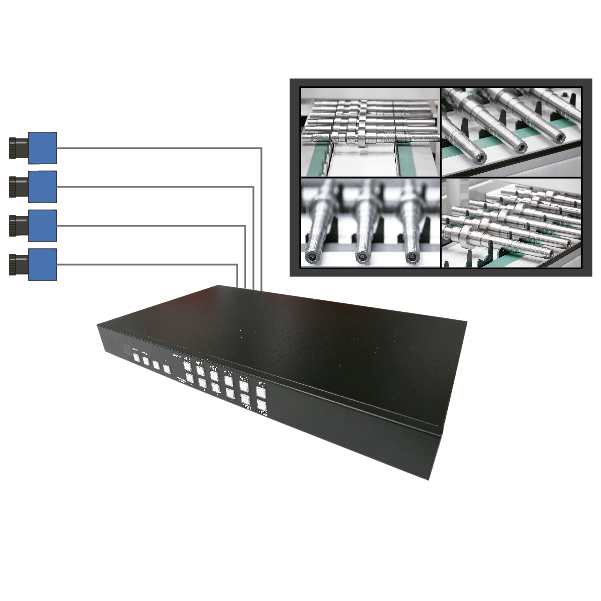 |
HDMI screen splitter CDPS-41SQN |
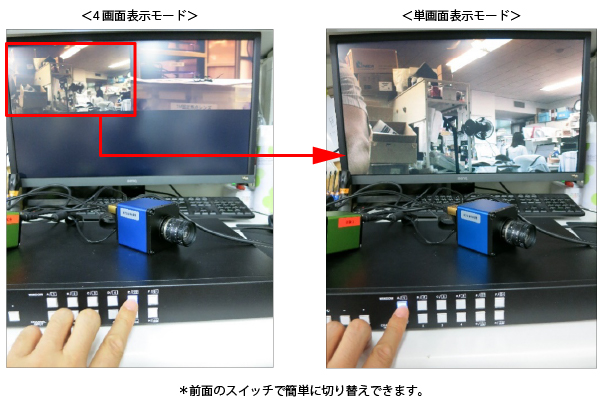
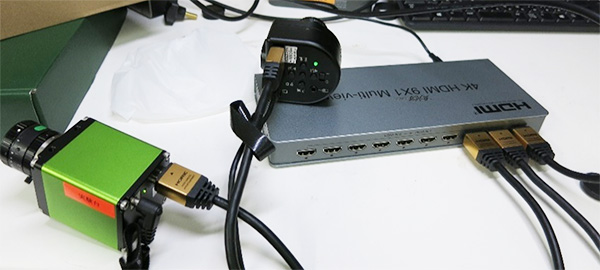
3. Connecting 9 high-definition cameras
This is a commercially available splitter that can connect 9 units.
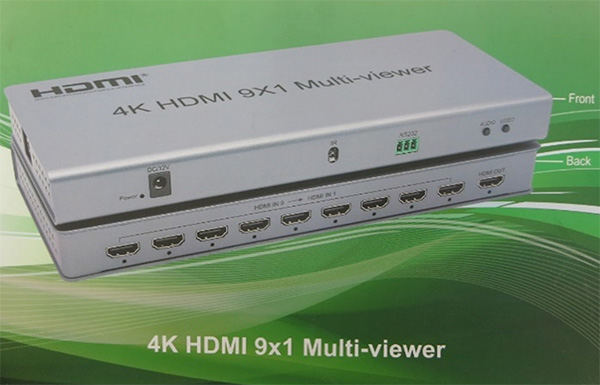
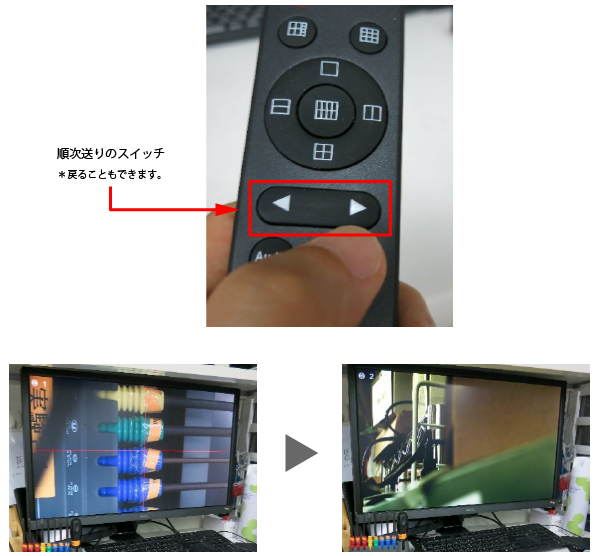
All operations are done by remote control. Operations cannot be performed on the multiviewer itself.
(Connection example) Connecting two high-definition cameras of different models
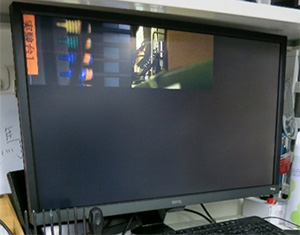
The functions include 9-screen display mode, 4-screen display mode, and 1-screen display mode.
<9-screen display mode>
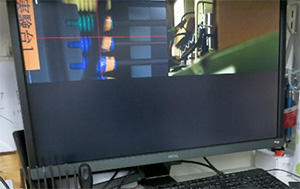
<4 screen display mode>
<Single screen display mode>
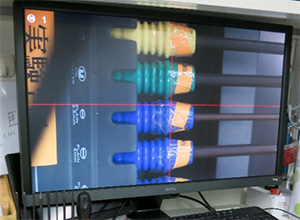
*When in single screen display mode, each screen can be displayed in sequence.
4. For USB cameras
When performing split display (multi-screen display) using a USB camera, no hardware is required; our software, HiTriggerFPro4 and HiTriggerQ, can support multiple devices.
HIGH-SENSITIVITY HIGH-DEFINITION CAMERA FOR BORESCOPES
What camera is required for a borescope?
When a camera is attached to a borescope, it becomes dark.
Therefore, a highly sensitive camera and strong lighting are required.
The BA200HD that we offer is low priced and highly sensitive, but depending on the conditions of the object and the type of borescope, even the BA200HD may become dark.
One option is to use lighting with a strong amount of light, but lighting with a strong amount of light is expensive.
Recommended function “Automatic Exposure Takumi”
Here we would like to introduce our high-performance high-definition camera.
High-performance features include high sensitivity, and combined with the “Auto Exposure Takumi” function, it is extremely effective in dark situations.
One drawback is that the camera element size is small at 1/2.8 inch, so the area that can be seen in the image is a little narrow.
However, it is compatible with borescopes smaller than φ2.7.
Shodensha’s high-sensitivity high-definition camera for borescopes
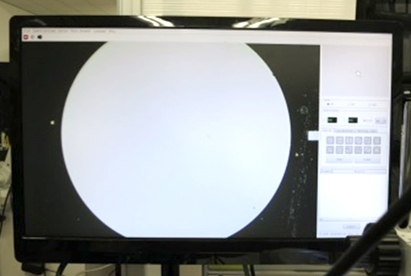
CALIBRATION OF HIGH RESOLUTION CAMERA WITH MEASUREMENT FUNCTION
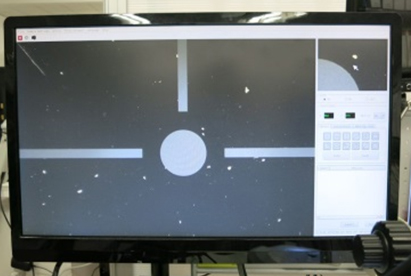
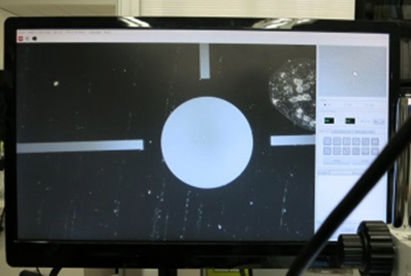
Calibration is performed on two axes: XY.
Normally, calibration is performed using two axes, but in order to simplify the calibration even a little, our high-definition camera uses a method that allows you to click any three points on a circle.
Calibration will improve if you use as much of the screen as possible.
(Although it is possible to calibrate small parts, the error will become larger (accumulation of errors))
Therefore, you need to choose a circle that is as large as possible.
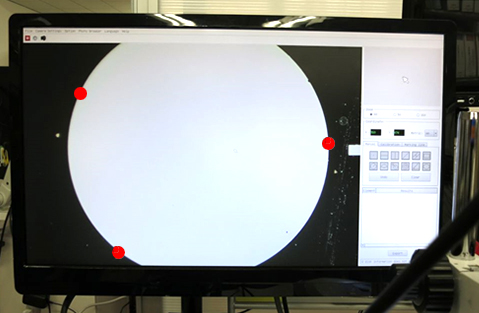
Not all circles need to be reflected.
It is OK if you can get any three points on the circle as large as possible.
Calibration itself can be done in any of the following ways. However, the error increases when (A) > (B) > (C).
| (A) | (B) | (C) |
 |
 |
 |
It is not necessary that the entire circle is visible.
For example, you can calibrate by selecting three points as shown below.
|
|
Hybrid high-definition camera (with measurement and drawing functions) GR200HD2-MePRO |
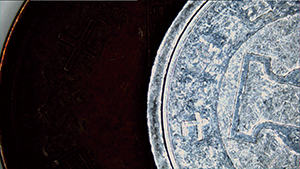
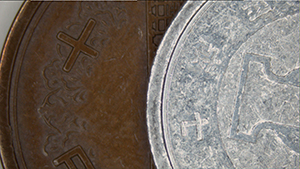
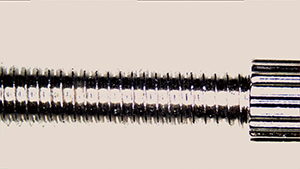
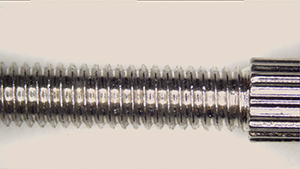
WHAT’S HIGH DYNAMIC RANGE FUNCTION?
This is a technique for expressing a wider dynamic range than normal images.
Reduces the contrast of a high-contrast original image to widen the dynamic range.
Even in images with differences in brightness and darkness, you can reduce shadows and overexposure.
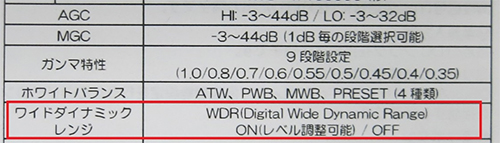
The following is an excerpt from the specifications of another company’s camera, and the WDR (wide dynamic range) function is the same.
What is dynamic range?
In camera terminology, there is something called dynamic range. Dynamic range is the range between the brightest and darkest areas that can be sensed by the image sensor.
The unit is expressed in dB (decibels).
Camera sensors have limits to the range of brightness and darkness that they can capture. Things that are too bright will be blown out, and things that are too dark will be blown out.
How to find dynamic range
The value of dynamic range can be determined by dynamic range [dB] = 20log10 (illuminance in bright areas/illuminance in dark areas).
What if the dynamic range is exceeded?
If the brightness exceeds this range, halation will occur.
If this range is exceeded in the dark, the screen will turn black.
HDR and WDR are functions that expand this range and reduce the difference between bright and dark areas. It is used to suppress halation.
(However, using this function will reduce the contrast.)
Dynamic range and camera selection
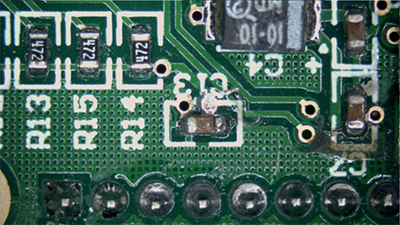
When you use the high-definition camera GR200HD2, which has an HDR (high dynamic range) function, to shoot images with differences in brightness and darkness, the difference will appear as shown in the photo below.
| Shoot in normal mode | Shoot in HDR mode |
 |
 |
| Shoot in normal mode | Shoot in HDR mode |
 |
 |
| Shoot in normal mode | Shoot in HDR mode |
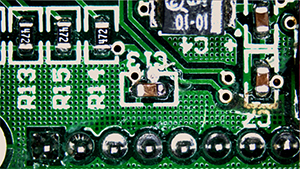 |
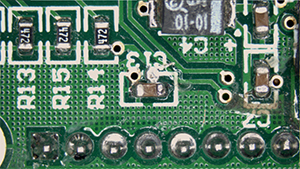 |
Points to keep in mind when using a camera with a dynamic range function
By applying this, you can shoot images with reduced halation.
(This is an effect that widens the dynamic range, but does not make it infinite, so it cannot be completely removed.)
If you use this HDR function in conjunction with a filter or V-block, the effect will be even better.
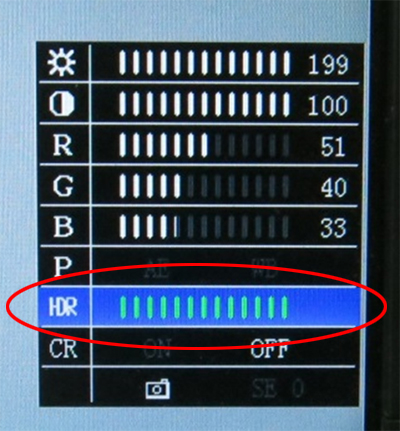
<HDR function + polarizing filter>
<HDR function + White V-shaped block (background)>

Photo: Menu screen of high-definition camera GR200HD2
HOW TO CONNECT CAMERA HD WITH PC?
There are several ways to input signals from a high definition camera to a PC.
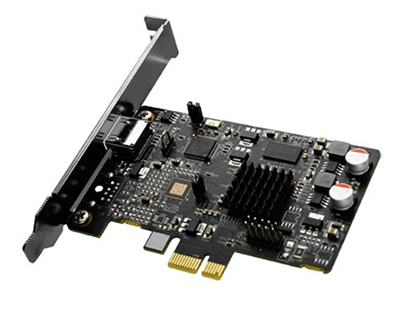
One way is to use a capture board.
However, the shape changes on a notebook PC or a desktop PC, and the shape of the throttle must also be considered.
We please introduce transducers that can be used irrespective of shape and PC type.
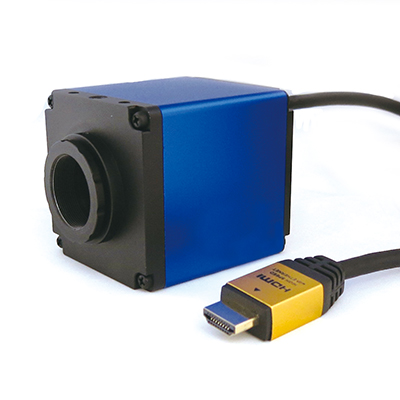
1.HDMI to USB 3.0 converter
The below picture is the HDMI to USB 3.0 converter manufactured by I-O DATA Corporation, identified as the GV-USB3/HD.
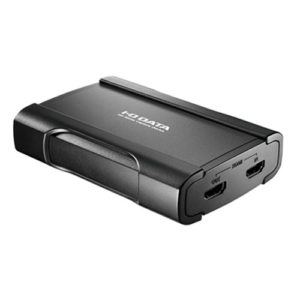
If you have a USB 3.0 port, you can use it on both laptop and destop.
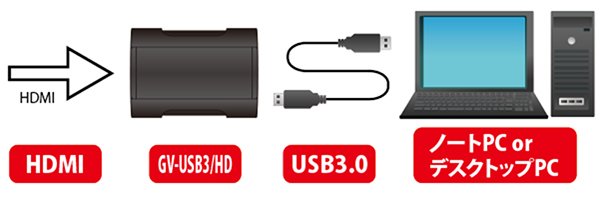
If you download special software from manufature’s official website, you can easily shoot movies and play it again on your PC.
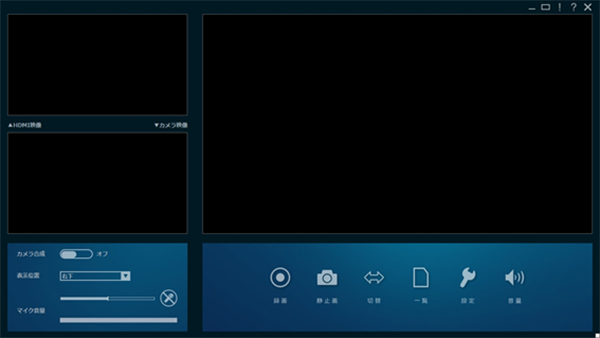
The advantage lies in the elimination of the process involving the removal of USB memory or SD cards from the camera and their subsequent insertion into the PC. However, it is important to note that, due to the specification of utilizing USB, real-time performance may slightly diminish compared to a direct connection to the monitor.
Additionally, it is imperative for the PC to be equipped with a USB 3.0 port, as the device will not operate with a USB 2.0 port. Furthermore, compatibility with high-definition cameras is extended to include the utilization of standard measurement software for microscopes.
HOW TO SAVE VIDEO FROM XM200HD (HIGH-DEFINITION CAMERA) USING EXTERNAL SIGNALS
XM200HD uses a dedicated remote control to save images.
If you only want to save images, you can control it externally without using a remote control.
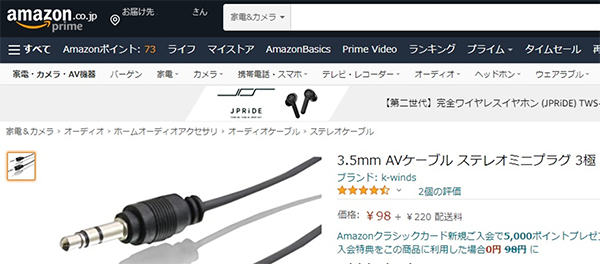
The terminal on the remote control is a ready-made 3-pole stereo mini plug 3.5mm.
It is also easily available on the internet.
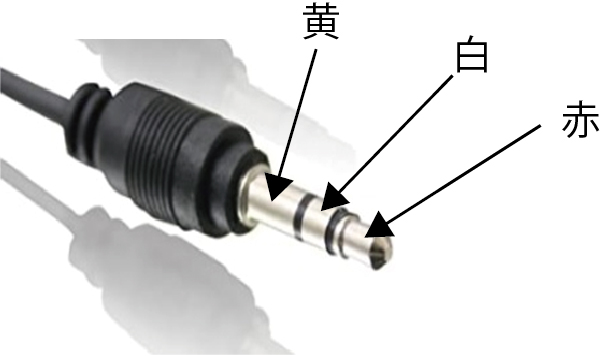
No problem even if you disconnect the optional remote control and use it.
If you disconnect the remote control and use it, insert a resistor (30KΩ) between the white wire and yellow wire to short circuit and a static image will be saved. (Make sure the resistance is 30KΩ.)

|
|
XM200HD high performance high definition camera |

ABOUT EXTENDING THE HDMI CABLE
There is no length limit in the HDMI standard, but metal cables are typically up to 15m.
Most cables on the market have a length of up to 15m.
When looking, they are probably sold up to about 20m high.
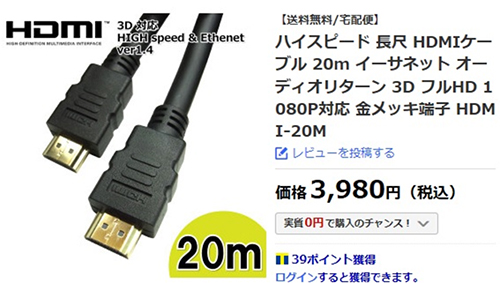
However, there are different types of extenders on the market that can be used to extend lengths beyond 100m.
Below is an extender that uses coaxial cable and allows extension up to 120m.
HOW TO SHOOT VIDEO WITH A HIGH-DEFINITION CAMERA THAT DOES NOT HAVE A STORAGE FUNCTION
There are two main ways to shoot video with a high-definition camera that does not have a storage function: “methods that use a PC” and “methods that do not use a PC.”
Please refer to the page below for information on how to use a PC.
|
|
As a method that does not use a PC, use an HDMI recorder.
We sell the following HDMI recorders.
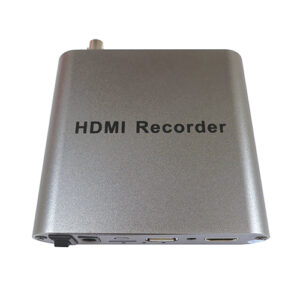
HDMI recorder HR-MINI
As mentioned above, there is no need for a PC; all you need to do is connect the monitor and camera with an HDMI cable.
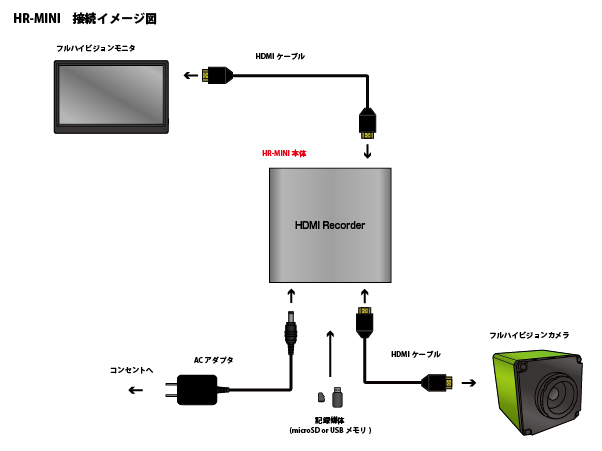
You can save images and videos to a microSD card or USB memory storage device connected to the main unit.
For details on installing an external HDD and long-term recording, please refer to the following page.
|
|
HOW TO TAKE OUT THE WIRING OF A HIGH-DEFINITION CAMERA FROM THE SIDE
The AC adapter and HDMI cable of our high-definition camera come straight out from the back of the camera.
When installing, you may want to shorten the space for this wiring section.
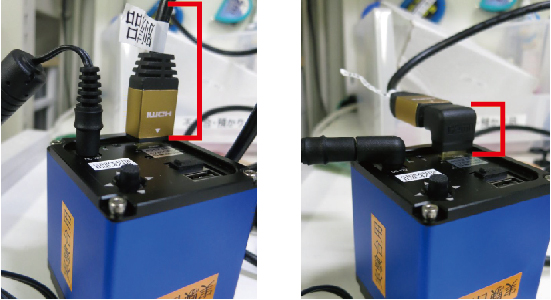
In that case, you can easily save wiring space by using a horizontal connector.
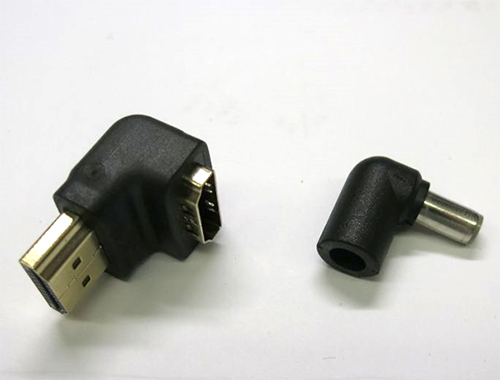
Horizontal connector – For HDMI cable (left) – For AC adapter (right)
You can omit the space on the back as shown in the photo below.
HOW TO USE HD CAMERA BY WIRELESS?
Wireless HDMI trensceiver is commercially available with low price.
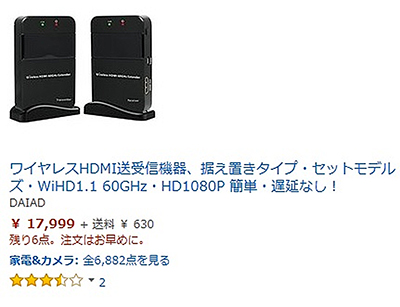
This time, I bought the one connected with our HDMI camera and checked the operation.
The transceiver size is same as a cigarette case.
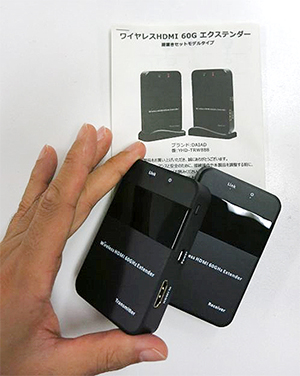 |
Since the power is very necessary for each transmitter and receiver, I think that it doesn’t change interm of saving wiring. |
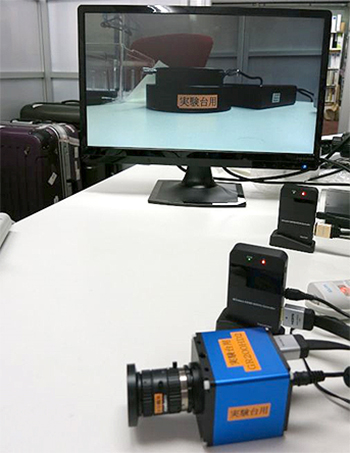 |
There is no delay or color deterioration. |
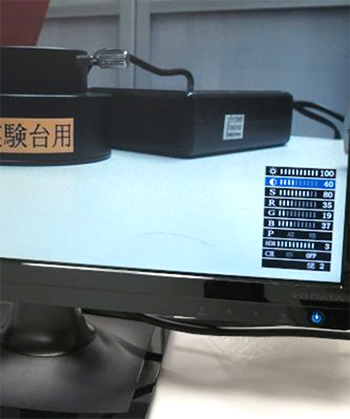 |
There is no problem with menu and display function. Camera is also ok too. |
Please understand that it does not guarantee the operation of all HDMI wireless transmitter/receiver.
HOW TO USE HD CAMERA BY WIRELESS?
Wireless HDMI trensceiver is commercially available with low price.
This time, I bought the one connected with our HDMI camera and checked the operation.
The transceiver size is same as a cigarette case.
|
Since the power is very necessary for each transmitter and receiver, I think that it doesn’t change interm of saving wiring. |
|
There is no delay or color deterioration. |
|
There is no problem with menu and display function. Camera is also ok too. |
Please understand that it does not guarantee the operation of all HDMI wireless transmitter/receiver.