I’ve summarized the camera systems that can be used for inspecting engine cylinder walls or can walls. I’ll introduce them with actual images, as well as their respective merits and drawbacks.
●Test conditions
<Sample>
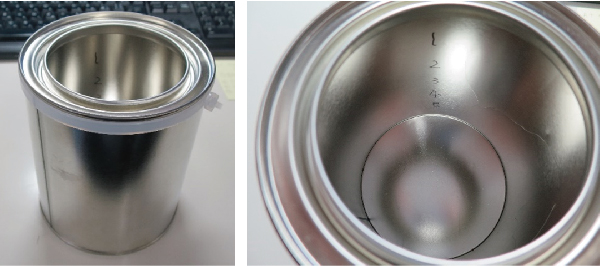
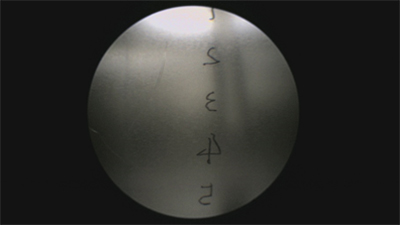
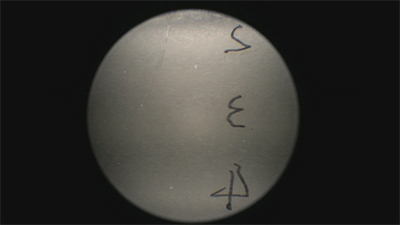
Since engine cylinders are difficult to obtain, we conducted the test using aluminum cans this time.
The size of the aluminum can is φ100mm × H130mm.
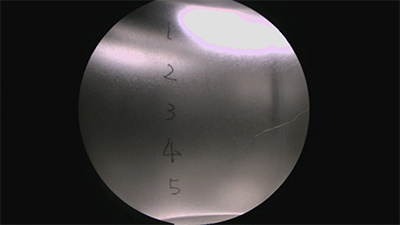
We marked numbers 1 to 5 on the inner wall.
We made scratches in several places.
<Camera>
Methods 1 to 5 used our full high-definition camera. ⇒ Camera used here
By using the same camera, we can compare the lenses purely.
*For method 6, we used an S-mount UVC camera as a special edition.
●Inspection Method and Results
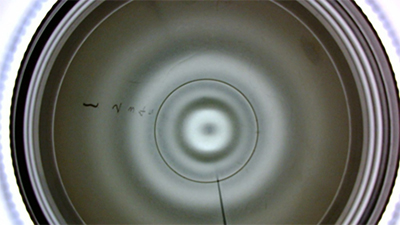
1. Method for inspecting the entire circumference of the inner wall in one shot using a wide bore scope
①ワイドボアスコープ φ4mm ボアスコープ 0°
②平型ドーム式照明 DC-30D-127W-CH1
③ボアスコープ用照明 LED-3WDB
 |
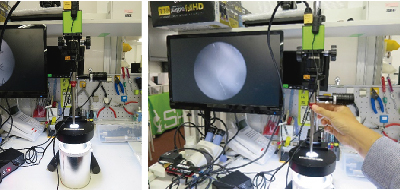
Left: Shooting Scene Right: Insertion Port Enlarged The borescope can be observed slightly away from the entrance of the can. There is a distance, and scratches close to the bottom are less visible. |
|
 |
The borescope is positioned slightly away from the entrance to capture the entire area in a single frame. |
|
 |
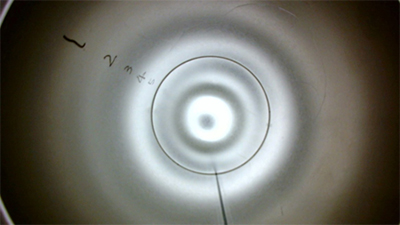
Position the borescope slightly inside the entrance to capture an enlarged view. |
The operability is rated at ★4 since the entire circumference of the inner wall can be checked in one shot.
The visibility level of scratches is rated at ★3.
Method 2: Inspection using a 90° side-view borescope (φ4mm) (Requires bore rotation)
 |
Shooting Scene The borescope is inserted into the can. Rotating the bore is necessary to inspect the entire circumference (requires rotating the camera along with the bore). Additionally, when enlarging, the top and bottom cannot be observed in a single frame, requiring vertical movement as well. |
|
 |
Position the borescope slightly away from the inner wall to capture the entire height in a single frame. |
|
 |
Bring the borescope close to the inner wall to capture an enlarged view. |
If inspecting the entire circumference of the inner wall, bore rotation is necessary, requiring rotation of the camera as well, thus rated at ★2 for operability.
However, the visibility level of scratches is rated at ★4.
3. Method: Inspection using a 90° side-view (interchangeable tip) swivel borescope (φ8mm) (Requires bore rotation)
 |
Shooting Scene The borescope is inserted into the can. To inspect the entire circumference, bore rotation is necessary, but since it’s a swivel borescope, the tip tube can be rotated. (Camera rotation is not required) |
|
 |
The borescope was positioned away from the inner wall for the shot, but capturing the top and bottom in a single frame is not possible, so some vertical movement is required. |
|
 |
Bring the borescope close to the inner wall to capture an enlarged view. |
If inspecting the entire circumference of the inner wall, a swivel borescope eliminates the need for camera rotation, but vertical movement is necessary, rated at ★3 for operability.
However, the visibility level of scratches is rated at ★4.
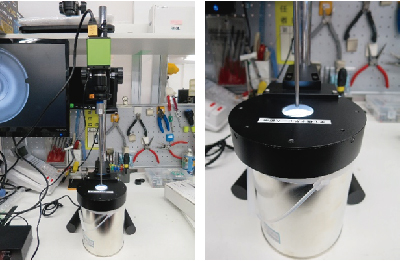
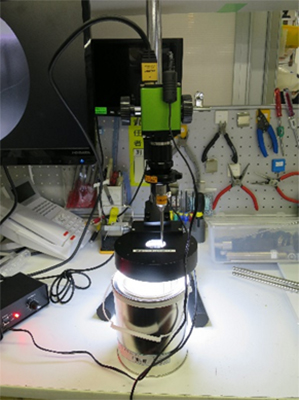
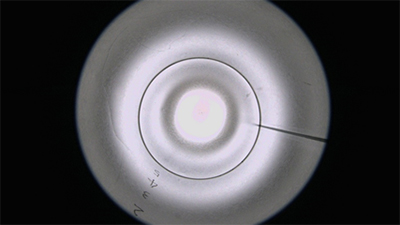
4. Method: Inspecting the entire circumference of the inner wall in one shot using a microscope for observing hole walls
①穴内壁観察用マイクロスコープ(φ20mm~120mm用) PH200BA-D30
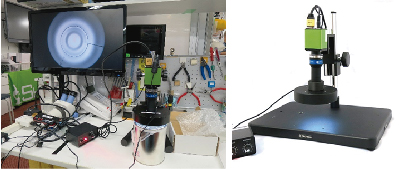 |
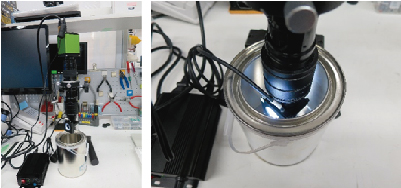
Left: Shooting Scene Right: Product Photo |
|
|
The lens is positioned near the entrance (no need to insert into the can) to allow for a one-shot inspection of the entire circumference inside the can. Visibility is reasonably good. Since there’s no need to insert the lens portion into the can, the risk of damaging the sample is low. |
||
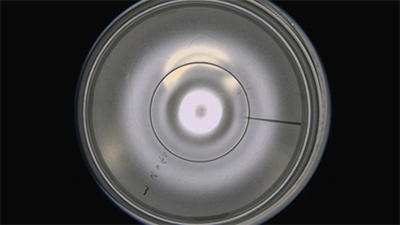 |
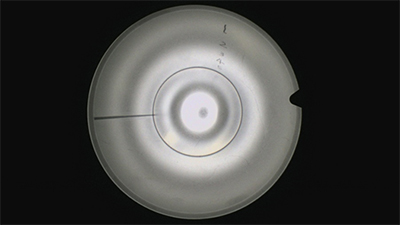
Position the lens slightly away from the entrance to capture the entire area in a single frame. |
|
 |
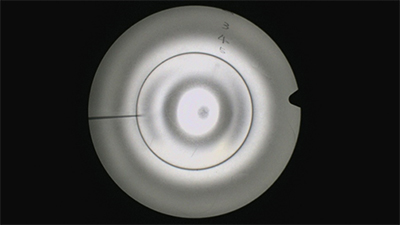
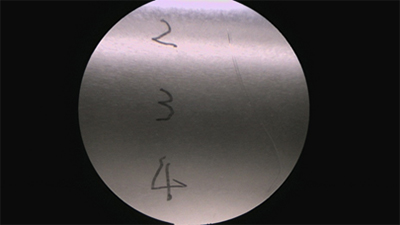
Capture the image with the lens positioned right at the entrance, allowing for maximum magnification. However, it’s not particularly suitable for significant magnification.
|
|
Operability is rated at ★4 since the entire circumference of the inner wall can be checked in one shot.
The visibility level of scratches is also rated at ★4.
5. Method: Inspection using a high-magnification lens with a 90° side-view mirror attached to the tip (Requires lens rotation)
1. High-magnification lens: FZ lens
2. Custom-made: 90° side-view mirror attached to the tip of the lens
3. Custom-made: LED illumination for attaching the 90° side-view mirror
 |
Left: Shooting Scene Right: Insertion Port Enlarged The lens is fully inserted into the can for observation. |
|
 |
Minimum magnification: Approximately 40x |
|
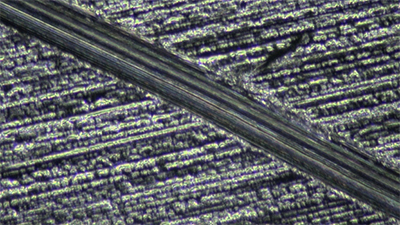 |
Maximum magnification: Approximately 200x |
Operability is rated at ★1 because the main focus is on magnification, and the visible area at once is narrow, making it difficult to search.
However, the visibility level of scratches is rated at ★5.
It’s worth noting that while it’s not very practical for scratch detection purposes, it’s primarily intended for magnification observation.
。
6. [Special Edition] Method for inspecting the entire circumference of the inner wall in one shot using an S-mount camera and fisheye lens
1. UVC camera
2. Fisheye lens
3. Flat dome-type lighting DC-30D-127W-CH1
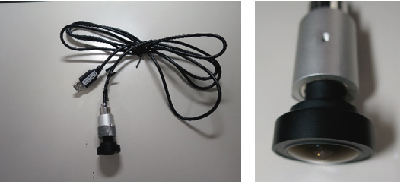 |
Attach a fisheye lens to a tube camera with interchangeable lenses. This allows for side-view observation while maintaining direct viewing. |
|
|
* Since the lens diameter is 28mm, it cannot observe small-diameter objects like borescopes. It’s also not suitable for deep holes.
|
||
 |
Capture the image with the camera positioned slightly away from the entrance of the can. |
|
 |
Capture the image with the camera positioned right at the entrance of the can. |
|
Operability is rated at ★4 since the entire circumference of the inner wall can be checked in one shot.
The visibility level of scratches is rated at ★3.
However, the visibility greatly varies depending on how the lighting is applied, resulting in extreme differences between bright and dark areas.
Summary:
When observing inner walls, it’s essential to choose a camera system that fits your budget and purpose.
Considering operability is also recommended during the evaluation process.
Recommended camera systems to choose from based on usage
<If you want to check the entire circumference inside the can in one shot for the purpose of finding scratches>
4. Method for inspecting the entire circumference of the inner wall in one shot using a microscopewith an aperture wall observation function.
① The aperture wall observation microscope (for φ20mm to φ120mm) PH200BA-D30 is the best option.
<If you want to magnify the scratches>
5. Method for inspecting using a high-magnification lens with a 90° side-view mirror attached to the tip (Requires lens rotation) is the best option.
<If you want to ensure absolute visibility of the inner wall direction at 90° without missing anything>
3. Method for inspecting using a 90° side-view (interchangeable tip) swivel borescope (φ8mm) (Requires bore rotation)
① (Interchangeable tip) Swivel borescope φ8mm 90°
② Flat dome-type lighting DC-30D-127W-CH1
③ Borescope lighting LED-3WDB is the best option.
<If you want to observe the bottom and inner walls with one device>
1. Method for inspecting the entire circumference of the inner wall in one shot using a wide-angle borescope is the best option.
<If price is a priority>
6. [Special Edition] Method for inspecting the entire circumference of the inner wall in one shot using an S-mount camera and fisheye lens is the best option.