<SAMPLE>
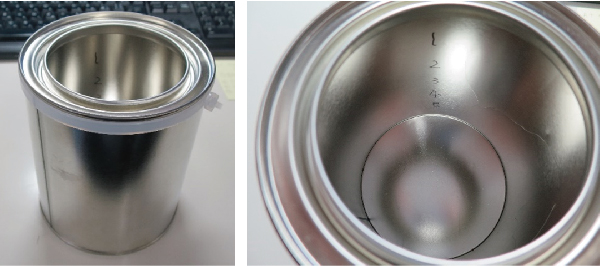
Given the difficulty in obtaining engine cylinders, we conducted tests using aluminum cans for this study. The dimensions of the aluminum can were φ100mm×H130mm. We inscribed numbers from 1 to 5 on the interior wall and introduced several scratches in various locations.
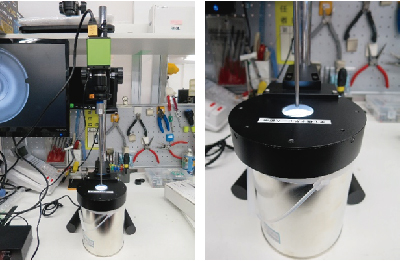
<CAMERA>
Methods 1 to 5 utilized our company’s full high-definition camera. The details of the camera used can be found here. By standardizing the camera, we were able to conduct a pure comparison of lenses. Additionally, for method 6, we employed an S-mount UVC camera as an additional edition.
1. Method for inspecting the entire circumference of the inner wall in one shot using a wide-bore scope.
1. Wide-bore scope: φ4mm
2. Flat dome-type illumination: DC-30D-127W-CH1
3. Illumination for borescope: LED-3WDB
 |
Left: Scene of the capture The borescope can be observed slightly protruding from the entrance of the can. Due to the distance and proximity to the bottom, visibility of scratches near the depths is reduced. |
|
 |
The borescope was positioned slightly away from the entrance to capture the entire area within a single frame. |
|
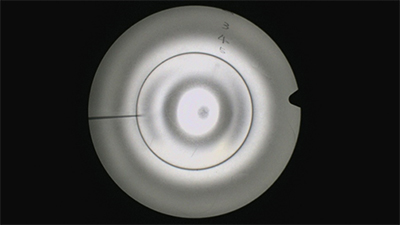 |
To magnify the view, the borescope was slightly inserted from the entrance and captured. |
The operability is rated at ★4 due to the ability to confirm the entire circumference of the inner wall in one shot.
The visibility level of scratches is rated at ★3.
2. Method for inspection using a 90° side-view borescope (φ4mm) (requires rotation of the bore).
1. Borescope: φ4mm, 90° side-view
2. Flat dome-type illumination: DC-30D-127W-CH1
3. Illumination for borescope: LED-3WDB
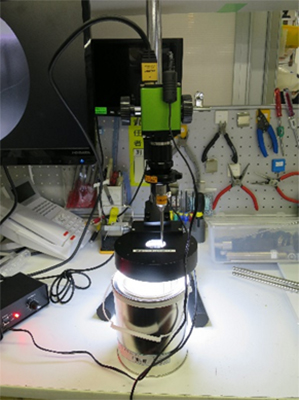 |
Scene of the capture: The borescope is inserted into the can. Rotating the bore is necessary for complete circumference inspection (requires rotating the camera). Additionally, during magnification, the entire top-to-bottom view cannot be observed in a single frame, necessitating vertical movement. |
|
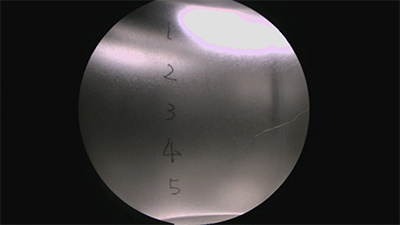 |
To ensure the entire height fits within one frame, the borescope was positioned slightly away from the inner wall for the capture. |
|
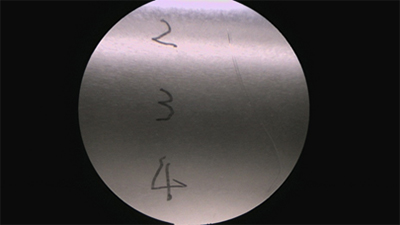 |
To magnify the view, the borescope was brought close to the inner wall for the capture. |
Rotating the bore is necessary for inspecting the entire circumference of the inner wall, requiring rotation of the camera itself, resulting in a usability rating of ★2.
The visibility level of scratches is rated at ★4.
3. Method for inspection using a 90° side-view (interchangeable tip) rotatable borescope (φ8mm) (requires rotation of the bore).
1. Rotatable borescope (interchangeable tip): φ8mm, 90° side-view
2. Flat dome-type illumination: DC-30D-127W-CH1
3. Illumination for borescope: LED-3WDB
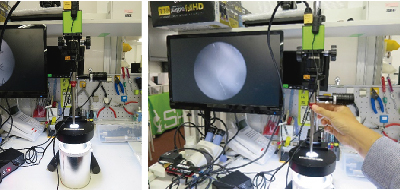 |
Scene of the capture: The borescope is inserted into the can. While rotation of the bore is necessary for complete circumference inspection, the rotatable borescope features an interchangeable tip that allows rotation of the tip tube, eliminating the need for camera rotation. |
|
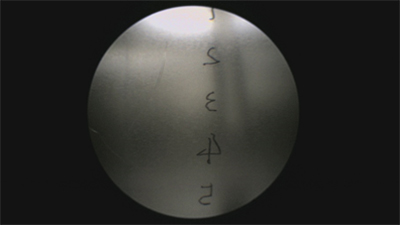 |
The borescope was positioned away from the inner wall for the capture, but capturing the entire top-to-bottom view in one frame proved challenging, necessitating slight vertical movement. |
|
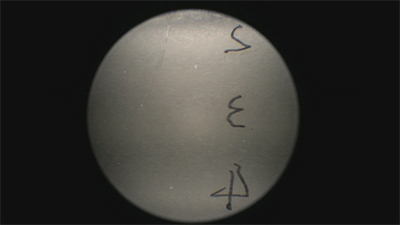 |
To magnify the view, the borescope was brought close to the inner wall for the capture. |
For inspecting the entire circumference of the inner wall, rotation of the bore is unnecessary with the rotatable borescope. However, vertical movement is required, resulting in a usability rating of ★3.
The visibility level of scratches is rated at ★4.
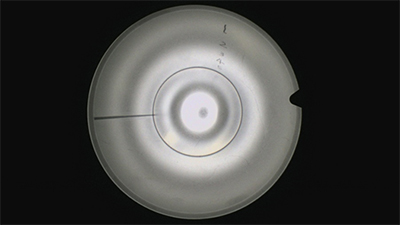
4. Method for inspecting the entire circumference of the inner wall in one shot using a microscope for observing hole walls.
1. Microscope for observing hole walls (for diameters ranging from φ20mm to φ120mm): PH200BA-D30
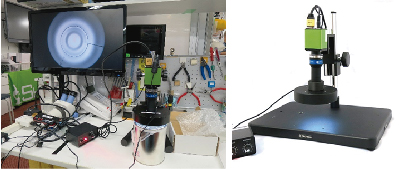 |
Left: Scene of the capture Right: Product photograph |
|
|
The lens is positioned near the entrance (no need to insert into the can), allowing for a complete circumference inspection of the can interior in one shot. Visibility is reasonably good. Since there’s no need to insert the lens portion into the can, the risk of damaging the sample is low. |
||
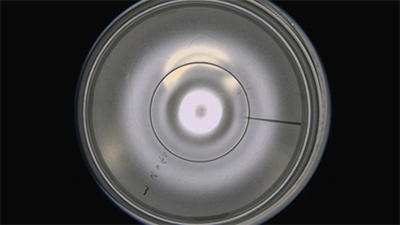 |
To ensure the entire area fits within one frame, the lens was positioned slightly away from the entrance for the capture. |
|
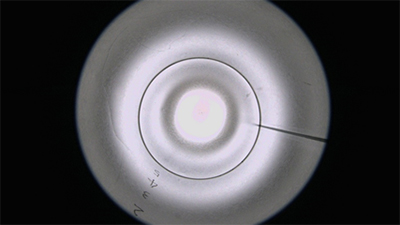 |
To magnify the view, the lens was positioned at the very edge of the entrance, but it’s not particularly suited for magnification. |
|
Operability is rated at ★4 due to the ability to confirm the entire circumference of the inner wall in one shot.
The visibility level of scratches is also rated at ★4.
5. Method for inspection using a high-magnification lens with a 90° side-view mirror attached to the tip (requires rotation of the lens).
1. High-magnification lens: FZ lens
2. Custom-made 90° side-view mirror attached to the tip of the lens
3. Custom-made LED illumination for attaching the 90° side-view mirror
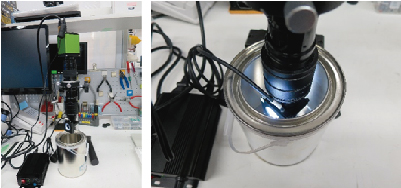 |
Left: Scene of the capture Right: Magnification of the insertion part The lens is fully inserted into the can for observation. |
|
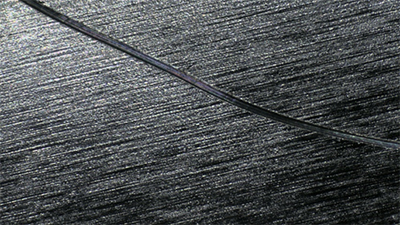 |
Minimum magnification: Approximately 40 times |
|
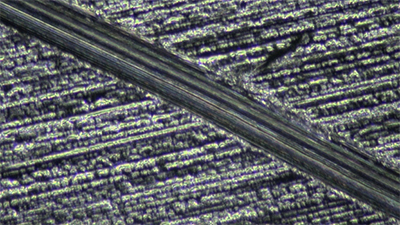 |
Maximum magnification: Approximately 200 times |
Mainly focused on magnified observation, the visible area at once is narrow, making it difficult to navigate, resulting in a usability rating of ★1.
The visibility level of scratches is rated at ★5.
However, it’s worth noting that for scratch detection purposes, this method may not be practical, and it’s primarily intended for magnified observation purposes.
6. [Special Edition] Method for inspecting the entire circumference of the inner wall in one shot using an S-mount camera and fisheye lens.
1. UVC camera
2. Fisheye lens
3. Flat dome-type illumination: DC-30D-127W-CH1
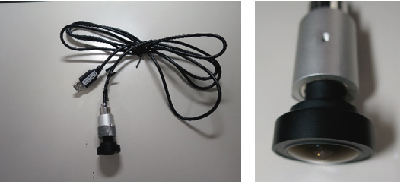 |
A fisheye lens is attached to a tube camera with interchangeable lenses. This allows for both direct viewing and side-view observation simultaneously.。 |
|
|
* With a lens diameter of 28mm, unlike borescopes, it cannot observe narrow objects. * Additionally, it is not suitable for deep holes. |
||
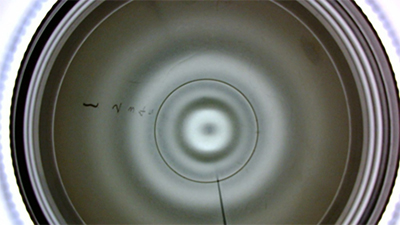 |
Capturing the image slightly away from the entrance of the can. |
|
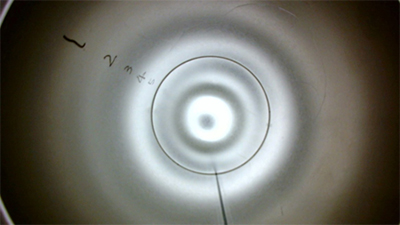 |
Capturing the image right at the entrance of the can. |
|
Operability is rated at ★4 due to the ability to confirm the entire circumference of the inner wall in one shot.
The visibility level of scratches is rated at ★3.
However, it’s worth noting that the visibility can vary significantly depending on how the lighting is applied, resulting in extreme contrasts between bright and dark areas.
<Summary>
When observing inner walls, it’s essential to select a camera system that aligns with your budget and intended purpose.
Considering usability is also recommended during the evaluation process.
Selecting a camera system based on your specific application. Recommended camera systems:
If you aim to inspect the entire circumference of the inner wall in one shot for scratch detection purposes:
4. Method for inspecting the entire circumference of the inner wall in one shot using a microscope for observing hole walls.
– The PH200BA-D30 microscope for observing hole walls (for diameters ranging from φ20mm to φ120mm) is recommended.
If you desire magnified observation of scratches:
5. Method for inspection using a high-magnification lens with a 90° side-view mirror attached to the tip (requires rotation of the lens) is recommended.
If you want to ensure comprehensive observation without missing any area in the 90° inner wall direction:
3. Method for inspection using a 90° side-view (interchangeable tip) rotatable borescope (φ8mm) (requires rotation of the bore) is recommended.
– The components mentioned, including the interchangeable tip rotatable borescope (φ8mm, 90°), flat dome-type illumination (DC-30D-127W-CH1), and illumination for borescope (LED-3WDB), are recommended.
If you want to observe both the bottom and inner walls with a single device:
1. Method for inspecting the entire circumference of the inner wall in one shot using a wide-angle borescope is recommended.
If price is a primary consideration:
6. [Special Edition] Method for inspecting the entire circumference of the inner wall in one shot using an S-mount camera and fisheye lens is recommended.

